. -->
Showing posts sorted by relevance for query Easter eggs. Sort by date Show all posts

4.14.2020

seed packet-inspired decor

art, boho, crafting, decorating, DIY, diy decorating, farmhouse, flowers, found objects, garden art, junk makeover, junking, original designs, paper crafts, Posie Pails, re-purposing, rustic, salvaged, spring, trash to treasure, up-cycling, seed packets, garden seeds
spring is here, and things are starting to bloom!
looking for a fresh addition to our spring decor after removing the Easter eggs,
i found inspiration in one of my own past projects...

about seven years ago, i shared a project here on the blog that i called 'Posie Pails'.
basically, i combined a colorful floral seed packet, some twine, and a recycled tin can
and the result was garden-theme decor accents on the cheap:

art, boho, crafting, decorating, DIY, diy decorating, farmhouse, flowers, found objects, garden art, junk makeover, junking, original designs, paper crafts, Posie Pails, re-purposing, rustic, salvaged, spring, trash to treasure, up-cycling, seed packets, garden seeds
well, i just figured out how to make an even cheaper 'quarantine crafts' version of them:

because it isn't essential to leave the house for craft supplies,

 i found a way to use floral images clipped from magazines to create my OWN 'seed packets'!
.
continue reading to see how i turned actual trash into a springtime treasure....

4.18.2014

Now That's Spring Water!

Here's a simple and pretty idea for your Spring Celebrations,
inspired by something I've done before...

At the 'Summer Retreat' vintage show I hosted on my farm on an island in Washington state,
I created a container of flavored water for guests to enjoy.
Frozen blueberries sank to the bottom of the container, and red strawberries floated on the water -
creating a perfect 'Red, White, & Blue' striped effect.
And I snapped a photo of it because I thought it was pretty:
red white and blue water farm fresh entertaining ideas from homewardFOUNDdecor.com
Then last summer, I shared it here on the blog.
Apparently, y'all liked it -
because this last-minute image is my MOST POPULAR PIN ever!

I thought it was time for an update on that idea for Spring, 
so I created flavored water using citrus and flower petals!
It's a bright, pretty Spring look for your beverage station at a brunch or luncheon.
[ Now let's see how THOSE pics do on Pinterest ;) ]

Here's how to get the separated floating layers:

 * Fill container 3/4 full of cold water. 
* Add citrus slices. 
* Add ice cubes carefully so that they float on top of the citrus.
* Then add in the flower petals, which will float on top of the ice cubes.

I used pretty pink geranium petals and bright yellow lemons...
but there are SO many color and flavor combinations you could try!

... and you know, you COULD put some plastic Easter eggs in the container, too ;)
___________________________________________________________

 * * * IMPORTANT NOTE: * * *
 Some flowers can be toxic to humans. 
Make sure you research before adding them to water for drinking. 
Photos shown are for visual inspiration only - this is NOT A RECIPE.
____________________________________________________

shared online:

One Project Closer | Creativity Unleashed


Common Ground | Be Inspired

Cupcakes & Crinoline | Project Inspire{d}

Denise Designed | Sunday Features #174

3.05.2021

yes, you can make a bird nest!

nests,garden,trash to treasure,DIY,diy decorating,tutorial,re-purposing,salvaged,junk makeover,crafting,winter,spring,garden art,wreaths,boho style,rustic style,farmhouse style,coastal style,inspired by nature,birdnests,diy bird nests,birdnest tutorial,found objects,yellow and gray home decor,Illuminating Yellow,Ultimate Gray, Pantone 2021,Pantone colors of the year
bird nests seem to me to be a sign of springtime...

over the years, i've been lucky enough to have found a few real ones, 
incorporating them into my home decor in spring. and fall. and on my Christmas trees!

i've also made quite a few - 
from elaborate to simple, from small seasonal versions sold via an enchanting online boutique
to an enormous one made for a client to hold a precious gold-embellished ostrich egg,

making them always connects me to nature.

this year i've made one with the slightest hits of gray and yellow elements
unearthed in my bins and boxes of saved materials,
and i thought i'd share the easy process of making them with you.

if you're sitting there thinking 'whaaaaa? MAKE a bird nest?!', continue reading!

3.27.2013

Nesting


i'm going to share a little secret with you:
accidentally discovered a 'Fast, Cheap, & Easy' TM way to make realistic bird nests!

one day while weeding some flowerbeds,
i grabbed a handful of [dead] daylily foliage right outta' the ground. just yanked it up.
it was in my hand and i looked at it, and then...
 i held onto one end, and wrapped the length of it around my hand a few times.
when i got to the other end, i tucked it into the wound-up stuff.
[don't you love the technical terms i use?!]
and even though it sort of looked like a donut,
i thought 'yep, it looks like a nest!'
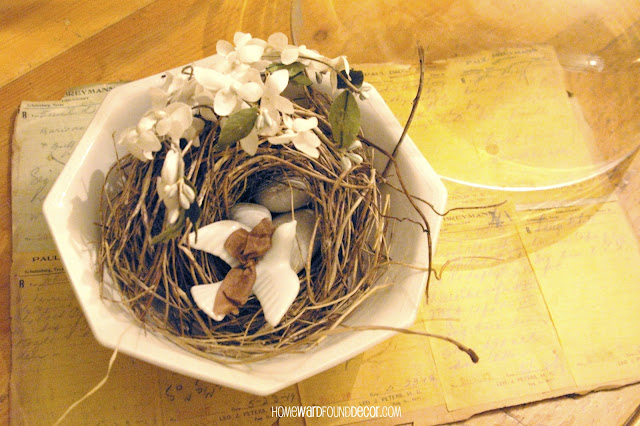
... and i carried it inside and sat it in the bowl you see in the photo above.

i added some vintage fabric flowers and a ceramic bird, and three white stones as 'eggs'.
nothin' fancy. i liked the way it looked.
 so i went outside and i made more!
[my flowerbeds were SO clean when i was done...]

and when i later decided to make these nests to SELL, i added stuff to the nests:
 * papier mache' eggs sit on a bit of moss glued to the nest as a bottom,
accented by a strip of vintage sheet music and a tiny dried stock blossom.

* a bed of moss holds a nest and a faux bird inside an armillary sphere lamp base
*a small nest sits atop a pedestal bowl, topped with another faux bird and a clear glass lamp globe

* miniscule nests sit inside glass salt cellars, adorned with vintage fabric millinery flowers and book clippings
[these would be fabulous place markers at an Easter table!]

* i've also used the bitsy ones as adornments on packages
[as seen in holiday issues of 
Creating Vintage Charm & FOLK Magazines]


* a HUGE nest in a display at a vintage show holds pretty lemons from the nearby trees,
covered with a rusted wire garden planter as a 'dome'
[this nest started out much neater.. it was handled a LOT that day!]

you can do this! 
try it using raffia. or field grass. or beach grass.
or daylily foliage. i've even used daffodil foliage.
 and my flowerbeds? they have never looked better! ;)

3.30.2013

Happy Easter


i am so thankful for the meaning of this holiday!

whether you celebrate in church or in a field of grass,
with lilies and crosses or bunnies and eggs,
may this Easter bring peace to your soul and light to your heart...

4.11.2014

The Grass Is Greener When It's Not Plastic!

I have a deep-seated dislike of plastic Easter grass.
With four children, the mess was just more than I could handle!
(and I can't even begin to tell you how many vacuum cleaners that stuff destroyed!!)

So years ago, I started finding alternatives....
the easiest one is just cutting up paper into small strips and crumbling it a bit.
Vintage sheet music, construction paper, wrapping paper - anything works better than plastic!

Another is shown above: fuzzy green 'eyelash' yarn, piled luxuriously in a basket or bowl.

My favorite solution for an abundant bed of 'grass' for a large Easter basket?
It's a BLANKET!
Made from soft, fuzzy green yarn, it's always reminded me of grass...
 I used it to cover a footstool in my home one Spring years ago:


A fuzzy green (or pink, or yellow!) SWEATER would work as a basket liner, too!

One final option is HAY. Yes, REAL hay!  
OK, maybe I mean STRAW.
Grab a mini-bale at the craft store, break the strings that hold it together, 
and fluff it up by shaking it around in a paper grocery bag.

Then fill baskets, galvanized pails, etc. with it to nest your eggs in!

3.21.2018

Create a Vintage Spring Tablescape

 yes, that IS brown on my table - in springtime!!!
everywhere you look, pastels reign supreme for spring + Easter decor, 

but this year i just felt like breaking the mold.

i love neutrals, and it's SO easy to create a neutral setting then add in a pop of color.
i've decorated this way for years and years, and it's never boring or limiting.
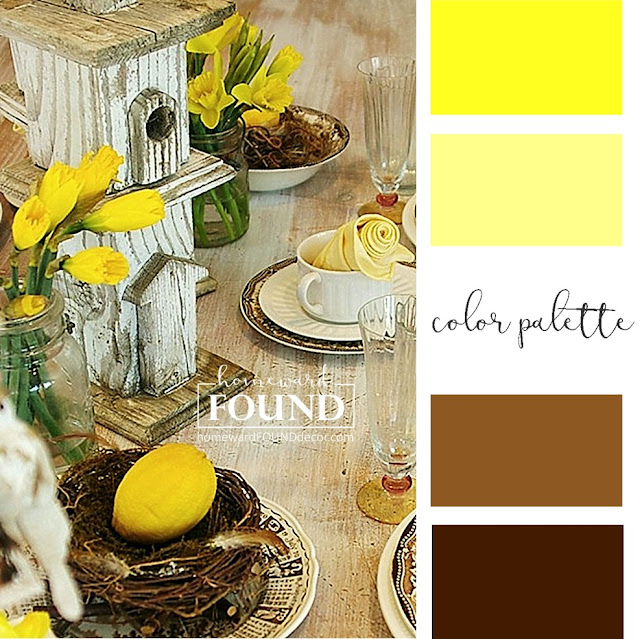
using a basic three-color palette (varied hues of brown, yellow, and white)
i've taken my own spring farmhouse style in a new direction with this tablescape...

continue reading to see how!

11.05.2014

The Holiday Tree: for Every Season

Let me tell you a story...

Monday, I was trying to come up with an idea for a post for today.
I had NUTHIN' - no how, no where. The well was DRY, my friends.
I was, frankly, 'too tired to be inspired'!!!
I posted on my facebook page and asked my HOMEees there to chime in, 
sharing their best tips for getting their creative MoJo back... and I got some great replies!

Carol took a very practical and restful tact:
'Take a day off from being creative... 
I find house cleaning to be very therapeutic and lets my brain rest.'
 
I joke that I only clean so I can decorate, 
but the truth is that cleaning is for me a bit like 'priming the canvas' is for a painter. 
It starts the creative engine running so ideas can flow!

Emily offered a virtual hug and a wide perspective:
'
Awww... we've all been there! I usually just take a break and/or head outside.'
 
Great advice - because, really, is it ever possible to head outside into the beauty of nature
(where ever you are) 
and NOT be inspired?! I don't think so. 

Lilliam spoke words of a sage:
'
Take a moment to just sit still, in silence and the inspiration for the right Idea will come to you. 
.Still.'

Oh, Lil, I try. I really DO. I'm just not a 'still' girl. 
I can walk on the beach for hours/miles. I can sit and read for hours.
But just sitting.... doing nothing.... waiting..... I just can't do it.
I hear the Jeopardy theme song every time I try!! 
(I CAN lie still for a massage, though!!)

So, after I read these words of wisdom, I decided to take a break.
I headed downstairs to the kitchen, to grab a fresh glass of ice water and then head outdoors...
and on the way into the kitchen, I walked past something.
I see it every day - in my peripheral vision.
I KNOW it's there, but it never really 'registers', if you know what I mean. It's just.... there.

But at THAT moment, I stopped.
I backed up a few steps and looked at it. For a good long while.
And while I did, I remembered something important.
That's when I KNEW that I had the content for this blog post!
So I ran upstairs, grabbed the camera, and went back down lickety-split
to snap a few images.

Aaaaaaand here we are.... today.

Do you want to know what I remembered?
That this small, inexpensive, simple decor element is something that I grew up with.
I remember it well from throughout my childhood.
And when I had my own children, I replicated it for them.
Now that THEY have children, they have replicated it, as well!

It's what we call 'The HOLIDAY Tree'.
(And it's not a Christmas tree by another name!)

It's a little tree that is decorated every season, for every holiday.

The idea is SO simple: It's a branch.
 As in, a branch off the tree in the yard or the nearby forest
or even purchased at the local craft store.
Not a BIG branch, just a lil' branch. Two feet tall or so.
It sits in a pot or planter or tin or box...
held in place by rocks or plaster of paris.

And there's pretty 'stuff' on the branches... 
little stuff, not heavy stuff:

We've used silly things like happy meal toys and action figures for Halloween,
vintage ornaments and mini candy canes at Christmas, 
bright plastic eggs for Easter, woven paper hearts for Valentine's Day, miniature flags in Summer,
everyone's favorite personal treasures for their birthday week, 
and some multi-colored plastic mini lights that look like the M&M characters.
 

Small things all, but the important thing was that every month there was a day 
when we all worked together to create & find fun things to decorate the Holiday Tree with.

I still have those colored plastic M&M light covers, BTW ;)

Mom uses Dollar Tree garlands and tiny ornaments 
and in this photo, she even used a felt coaster owl!
Anything goes.

The tree always sat somewhere we'd pass by it every day, 
so that the enjoyment was constant...

When I was a kid, the Holiday Tree sat on the HiFi (yes, I am OLD!) in the living room.
When my kids were young, our Holiday Tree sat on top of a cabinet on the stair landing or in the family room.

Right now, my Mom's Holiday tree is sitting on her buffet,  next to the kitchen door - which is where I saw it on Monday.
It's been in the room all along, decorated differently each season... but until Monday, 
I had completely forgotten about how much this tradition is a part of me. A part of my family.
A huge part of why decorating for every season is what I do. 


Now that I remember, I am so thankful for the simple ways 
that my Mom taught me about creativity. 
They've stayed with me... and my kids and grandkids. It's 'Generational Creativity'!


shared online:


Practically Functional | Creativity Unleashed