
.jpg "TUTORIAL: make a summer lampshade cover from a grass skirt")


I love that look, but not the price tags attached. When I read that the Crate and Barrel Kids 'Greta' floor lamp with raffia shade shown above was $249, I created a similar look for an existing lamp in my living room - using materials I already had on hand, of course!
Continue reading for an easy DIY tutorial that will work on any lampshade...


The lamp I created the shade for is a torchiere lamp - a large bowl sits on top of the lamp, aiming light upward and hiding the bulb from view. It was originally brass, and came from my Mom & Dad's house. Since all of the fixtures in our new home are silver metallic finishes, I sprayed the lamp base with a silver metal paint so it would blend in.
The final touch was to hide the 'bowl' by sitting a large linen drum lampshade on top. It's been that way for years now... until I got the wild idea to 'embellish' that lampshade.
To re-create my project, you only need one thing: a raffia / grass skirt!

You'll want several grass skirts to get the fullness that looks luxe like the ones shown up above. I have a few dozen raffia grass skirts from the dollar store, and use them in various ways...
Tutorial:
1. Lay your grass skirt out flat on a countertop or table.
.jpg)
2. Remove your lampshade from the light fixture and place it on its side on top of one end of the grass skirt. Turn the lampshade so that the top edge is just below the top edge of the skirt, and one of the support arms is placed directly over one end of the skirt.
.jpg)
3. Begin attaching the grass skirt to the lampshade from the end of the skirt:
Grab two pieces of the raffia ('grass') and pull them up from the skirt. Wrap one clockwise around the lampshade support arm, and wrap the other counter-clockwise around the lampshade support arm.
.jpg)
.jpg)
4. Tie a knot to secure the raffia strands to the lampshade support arm.
.jpg)
5. Roll the lampshade across the grass skirt until the next lampshade support arm is
facing down toward the skirt. Pull the skirt to make sure it is taut at the top of the lampshade, and repeat the last two steps.
.jpg)
6. Continue tying the raffia skirt to the lampshade support arms, making sure you keep the skirt taut as you work.
.jpg)
7. One grass skirt will cover 1/2 of a 24" diameter lampshade, as shown. Repeat all steps with another grass skirt to cover the other half. Then repeat the process with two MORE skirts to completely cover the lampshade beneath.
.jpg)
8. Once complete, turn the lampshade right side up and place it on your lamp.
You can see how pulling the raffia skirt inward and over the lampshade top rim both hides the edge of the skirt AND gives a curved effect - that helps the skirt look fuller.
.jpg)
.jpg)
If the raffia strands are too long, simply trim them with scissors at the length you wish.
The lampshade I made for our home is not made from the raffia skirts seen in the previous tutorial photos - I made ours using a raffia table skirt. (And didn't want to dismantle it to shoot tutorial photos, so I created a second one for the photos above!)

This is what I used on our lamp - it's 9 feet long, to wrap around 3 sides of a 6' folding table, and the grass length is 3'. That gave me a LOT of material to wrap around my lampshade.
I found mine at a thrift shop, but you can purchase them from Amazon online here . (not an ad) The hardest thing about using this one was that wide fabric band at the top - but it actually helped me create a cool effect!
.jpg "TUTORIAL: make a summer lampshade cover from a grass skirt")
Let me show you the secret to the 'tiered' effect of the raffia on this one:
.jpg)
Looking at the inside of the lampshade, you can see three tiers/layers of the TOP of the raffia table skirt. That light tan fabric is the thick edge of the table skirt, so I had to pull it in past the lampshade rim far enough to hide that fabric.
The first wrap around the shade sits just inside the top rim of the shade, and each wrap around following that sits just an inch further inside the top rim of the shade.
.jpg)
The three tiers are more visible here, looking up into the top of the shade - the linen lampshade top edge is on the far left side of the photo, and below that is the inner part of the shade. The raffia strands that tie each tier to the lampshade frame support arms are really visible here.
As each layer is wrapped and tied in closer to the center of the lampshade, the raffia on the outside of the shade falls at different levels and creates the 'tiered' effect.
.jpg)
This shows the thickness of the top edge of the raffia table skirt (about 1/2 an inch) and how the end of it is attached with two raffia strands, just as all of the other ties that hold it onto the lampshade frame.
When I placed my completed shade back on the lamp, I realized that the silver metal finish of the lamp wasn't what I wanted - so I grabbed a bottle of brown acrylic paint and quickly applied it with a soft brush. The brown finish matches a wood lamp in the living room, and looks much more natural with the new raffia shade...
.jpg)
.jpg)
.jpg "TUTORIAL: make a summer lampshade cover from a grass skirt")
The lamp looks great in the daylight, but even better at night!
.jpg "TUTORIAL: make a summer lampshade cover from a grass skirt")
And, in true homeward found decor fashion, this whole process is reversible - when you get tired of the look, just untie the raffia strands (or if your knots are stubborn, cut them!) and remove the raffia skirt from the lampshade.
I have another 'grass skirt' project to share with you soon... they really are a versatile material, and an inexpensive way to add texture and natural elements to your summer decor!
Related Content:

make my easy 'Beach in a Jar' project (seen in the first photo)
.jpg)
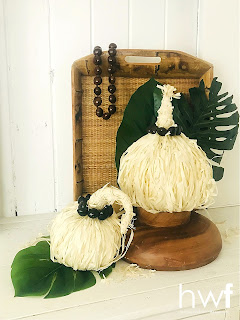
raffia-wrapped tropical pumpkins!

create a Christmas tree with raffia
Shared Online:
Funky Junk Interiors | New Upcycle Ideas #785

Thank you for including my project in your feature, Donna!

.jpg "TUTORIAL: make a summer lampshade cover from a grass skirt")
And, in true homeward found decor fashion, this whole process is reversible - when you get tired of the look, just untie the raffia strands (or if your knots are stubborn, cut them!) and remove the raffia skirt from the lampshade.
I have another 'grass skirt' project to share with you soon... they really are a versatile material, and an inexpensive way to add texture and natural elements to your summer decor!
Related Content:

make my easy 'Beach in a Jar' project (seen in the first photo)
.jpg)
raffia-wrapped tropical pumpkins!

create a Christmas tree with raffia
Shared Online:
Funky Junk Interiors | New Upcycle Ideas #785

Thank you for including my project in your feature, Donna!

summer,tropical style,tiki style,boho style,beach style,re-purposed, up-cycling,thrifted,DIY,diy decorating,decorating,lighting,neutrals,raffia lampshade,raffia lighting fixtures,tutorial
Well now this is just fun! Yes, I have noticed all the woven wonders for lighting and here you go and make it so simple to achieve!
ReplyDeleteThank you, Donna! It really WAS simple - and I LOVE that just as much as saving a whole buncha' money on decorating!
Delete