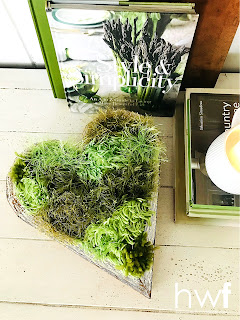
this wood heart-shaped planting box is the perfect way
for me to incorporate nature-inspired elements in my winter decor.
even though i'm not focused on creating for a specific 'holiday' now,
you've seen this element on the blog previously
as three different versions of wreaths perfect for February.
(previous posts linked below)
moss is a hot home decor trend this winter
and is showing up in many spring decor collections online...
from sculptures and floral designs to very large framed art pieces made of moss.
while i initially thought of using real moss for this project,
i found that one of my favorite 'faux' materials worked much easier
and with a lot less mess!
and with a lot less mess!
continue reading to see more details and my big 'secret' for moss...
dwk
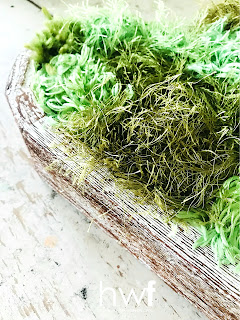
a closer look reveals that what LOOKS like moss isn't moss at all...
it's yarn creating the illusion of moss.
let me show you how easy it is to get this effect...
TUTORIAL
MATERIALS + TOOLS:
a wood planter box with styro filling and chicken wire structure
(available at most plant nurseries + garden centers)
scissors . a pencil or thin paintbrush . 3+ yarns of varied hues and thicknesses
for my project, i began with the heart-shaped wood planter i already had -
which had been painted yellow and white for a previous project.
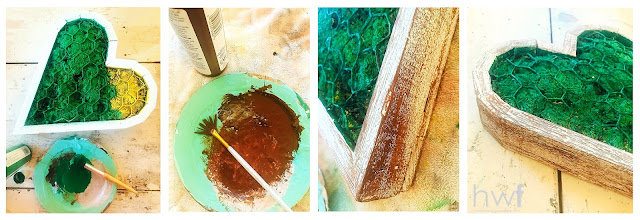
so i began by REpainting it, in colors that work for me now:
a deep forest green acrylic paint now covers the formerly bright yellow styrofoam.
for the wood box, i simply used a 'dry brush' paint dragging technique
that gave the white paint an aged, weathered look
(SO MUCH EASIER than sanding the wood!!!)
when the paint was dry, i began the process of adding the 'moss'.
my yarn choices for this project include
three colors of 'eyelash' yarn (very thin and fringed), olive green wool yarn,
and pieces of 'furry' green fabric cut from a worn out blanket
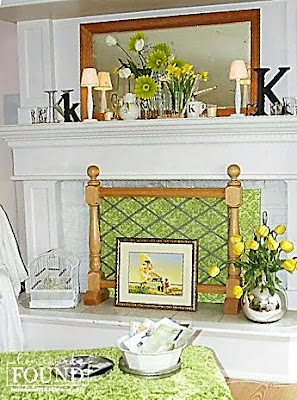
here's a photo of that blanket covering an ottoman in one of my past homes:
note: click on any image to enlarge it to see details
far left: my yarn choices purposefully have different green hues and tones
to enhance the 'natural' effect i wanted.
i cut a few small pieces from the furry blanket and figured out placement in the heart,
then used the thin end of a small paintbrush to push the fabric thru the chicken wire
and into the styrofoam, to hold it in place.
to enhance the 'natural' effect i wanted.
i cut a few small pieces from the furry blanket and figured out placement in the heart,
then used the thin end of a small paintbrush to push the fabric thru the chicken wire
and into the styrofoam, to hold it in place.
after the first furry piece was in place, i began adding the other yarns -
cutting a length of eyelash yarn to about 4' long, then winding it up on my hand into a mass
and placing it on the heart and pressing it into the chicken wire with the brush end.
some of the eyelash yarn is laid in more of a line than a ball,
just to give some interest to the composition.
i used the wool yarn to make a few simple 'pompoms', folded them in half,
and pressed them into the styrofoam to create 'moss' that sits a bit higher.
when complete, the yarns work together in hue and texture
to create a pretty realistic illusion of 'moss'...
to create a pretty realistic illusion of 'moss'...
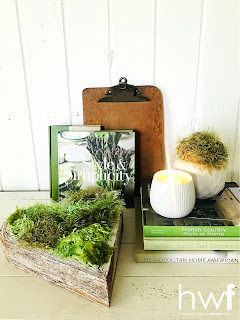
wood planters work well because you can display them in several ways:
standing on their side in a mantel display as shown above
standing on their side in a mantel display as shown above
to hang this, i wrapped the outer rim of the heart planter box with a velvet ribbon,
with the ends of the ribbon used above the heart to hang it.
i added another ribbon across the front of the heart to hold the other one in place.
with the ends of the ribbon used above the heart to hang it.
i added another ribbon across the front of the heart to hold the other one in place.
however you display it, it's sure to bring your love of nature indoors!
i hope this interpretation of nature-inspired decor inspires you
to try something similar, as you create a home you love to live in...
to try something similar, as you create a home you love to live in...
related content:
heart wreath with paper flowers

.jpg)



.jpg)


.jpg)
.jpg)
.jpg)

Love this Deb! You always have the most unique ideas!
ReplyDeleteDon't forget to join us over at the Creatively Crafty Linky Party every Wednesday through Sunday
https://creativelybeth.com/creative-crafts-linky-party/
Followed and Pinned!
Creatively, Beth
thank you for your kind compliment, Beth!
DeleteSO unique Deb! Love that you turned a heart into a forest-like work of art!
ReplyDeletethank you so much, Donna! it was a fun project!
Delete