spring 2020 sure is coming in like a... not lion. more like a T-Rex!
as we all adjust to this 'new normal' (and no, it's not normal),
we're all looking for activities that calm us, entertain the kids, make home a bit more... home-y.
.
using my recent 'paint your own paint chips' technique,
i've been happily painting away and then making new decor elements with the results...
this time 'round, i came up with flowers.
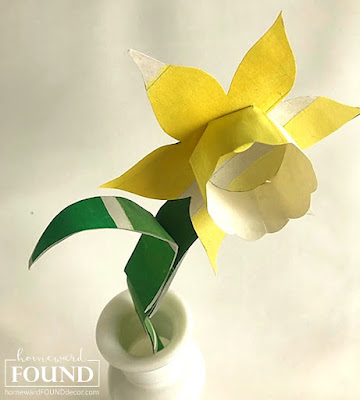
i'm not painting the roses red... i'm painting the daffodils yellow!
continue reading for my easy tutorial for this sweet spring project...
first, you'll need to paint your own 'paint chip paper'!
it's easy - and you can use my tutorial here.
simply pick the color you want to use - yellow, for daffodils -
and add white and black in increments to create a shaded palette of yellows.
then paint them onto paper, posterboard, cardboard, or even paper bags (like i did!)
after that dries, you're ready to begin!
let me walk you through making one daffodil:
* cut out a 'flower'-shape as seen on the right below.
also cut a strip (much like the paint strips in hardware stores).
how long should it be?
measure from the tip of one petal straight across to the tip of its opposite -
add on a smidge and cut to length.
how wide? half the width of your whole flower.
*next, cut some snips into one long side of the paint strip.
cut a scallop into the other side.
then bend just the snipped edge over, with the painted side facing out.
* bend that strip into a circle, as shown in the image second row right.
the snipped edge should be folding inward.
* use a glue stick to attach the circle to the center of your flower shape.
(seen in lower left image)
tip:
i've found that putting the glue on the flower shape and then sitting the circle down on it works best.
* cut a small round shape from the painted paper, and glue it into the center of the circle.
this time, put the glue on the round shape and press it down onto the flower.
i used some green paint chip paper to create simple stems and leaves,
and just glued the flowers onto those.
(truth be told, i took the shamrocks that i previously made out of green paint chip paper
(truth be told, i took the shamrocks that i previously made out of green paint chip paper
and took them apart to make the stems and leaves!)
once you have the flowers made, you can do all kinds of things with them!
i glued one daffy onto a small frame covered in burlap,
and paired it with the existing paint chip wall art on our gallery wall.
another two daffies took up residence in a milk glass vase,
and i placed them on the huge vintage scale in our kitchen:
so... what other flowers could you create using this method?
orange poppies? pink peonies? red roses? (ah, the Queen of Hearts would love that!)
if you'd love to see some really astounding ideas for creating with paint chips*,
check out this video created by the Sherwin Williams Paint Company for their advertising!
* and remember, i'm giving you this method to create your own paint chips/strips
so you don't go raiding the paint samples at the hardware store...
if you've already got paint chips at home, go for it!
but don't you be breaking those 'social distancing' and 'shelter in place' rules for a craft project. OK?
be safe. be wise. be well, my friends. ❤️😷
shared online:
funky junk interiors | diy salvaged junk projects #519
if you've already got paint chips at home, go for it!
but don't you be breaking those 'social distancing' and 'shelter in place' rules for a craft project. OK?
be safe. be wise. be well, my friends. ❤️😷
shared online:
funky junk interiors | diy salvaged junk projects #519


No comments:
Post a Comment