I HAD a plan for holiday content this year on the blog. Yes I did.
and then...
Surfing through IG one night when I couldn't sleep,
a photo shared by one of my former employers and clients
came across my screen - and wouldn't you know it,
came across my screen - and wouldn't you know it,
that one photo inspired a whole NEW idea and theme!
This is the photo posted by Molbak's Home + Garden Center near Seattle
to promote one of the themes of their holiday products this year.
(Back in the 90's, I was on their visual merchandising design team,
and have loved keeping up with their store visuals ever since -
sadly, the store closed down in 2024.)
Those are turned wood trees on the mantel.
(Back in the 90's, I was on their visual merchandising design team,
and have loved keeping up with their store visuals ever since -
sadly, the store closed down in 2024.)
Those are turned wood trees on the mantel.
but that's not how i interpreted it...
Instead, I saw a forest of terra cotta trees made from pots!
That one photo inspired me to create decor
that was subdued, simple, natural, and elegant -
that was subdued, simple, natural, and elegant -
along the lines of something from Pottery Barn, Terrain, and West Elm.
In the process, I've come up with different ways to use terra cotta potsto embody a new theme for the holidays this year...
...continue reading to see three styles of terra cotta trees!
dwk
Inspired by the Molbak's display photo,
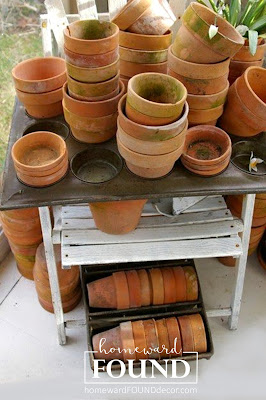
I gathered up all of the miscellaneous terra cotta pots I have on hand
and figured out what sizes were needed to make those 'tree' shapes possible.
I grabbed all of the smallest pots from Dollar Tree and stacked them up.
In the process, I discovered something:
The way the pots nest together makes a big difference in the 'tree' shape.
top row: If you just stack up the pots, they form a column - not a tree shape.
bottom row: Tiny plastic cups used as a spacer between each pot
allows the pots to sit a bit higher, creating a better 'tree' shape.
( I found the small hard plastic 'communion' cups at Smart & Final)
bottom row: Tiny plastic cups used as a spacer between each pot
allows the pots to sit a bit higher, creating a better 'tree' shape.
( I found the small hard plastic 'communion' cups at Smart & Final)
.jpg)
.jpg)
Oh yeah, about THOSE...
Truth is, I didn't like the way that the pot 'trees' had flat tops.
I would have loved to have had some French clay pots with a more conical shape,
but I didn't have any and wasn't really willing to spend $$$ to get some!
Then I remembered the stack of paper sno cones in my stash -
so I grabbed a few, painted them with the faux terra cotta finish,
and they gave my trees the pointed top that I wanted.
As you can see, the painted paper cones can stack up as trees, too!
I used small plastic cups as risers to add space between each cone here, too.
Next, I made some larger trees, using larger pots:
I did pick up four medium-sized pots at a local thrift shop for those,
to make the transition from large pot to tiny pot work better.
Larger plastic cups were used as spacers on these trees.
Making them is easy - but here's a tip:
Place them on a sturdy flat surface for the stability of the stack.
These trees are about 3 1/2 to 4 feet tall, so sturdy footing is important.
I remembered some ceramic trees that I have used and re-used in years past:
and painted them to look like terra cotta clay.
When some of the hot glue that held the pom pom trim on refused to come off,
I painted that bumpy surface to look like moss!
Using a few pots with REAL moss on them as a guide,
I used paint to replicated the look:
I did pick up four medium-sized pots at a local thrift shop for those,
to make the transition from large pot to tiny pot work better.
Larger plastic cups were used as spacers on these trees.
Making them is easy - but here's a tip:
Place them on a sturdy flat surface for the stability of the stack.
These trees are about 3 1/2 to 4 feet tall, so sturdy footing is important.
I remembered some ceramic trees that I have used and re-used in years past:
Some of them are ceramic, some are carved wood -
I grabbed them all, removed the pom pom & rickrack trim,and painted them to look like terra cotta clay.
When some of the hot glue that held the pom pom trim on refused to come off,
I painted that bumpy surface to look like moss!
Using a few pots with REAL moss on them as a guide,
I used paint to replicated the look:
This faux terra cotta paint treatment is exactly the same process I have used
on pumpkins in the past - I just added the final detail of
faux moss to the finished terra cotta paint.
on pumpkins in the past - I just added the final detail of
faux moss to the finished terra cotta paint.
Here's a quick look into my paint techniques:
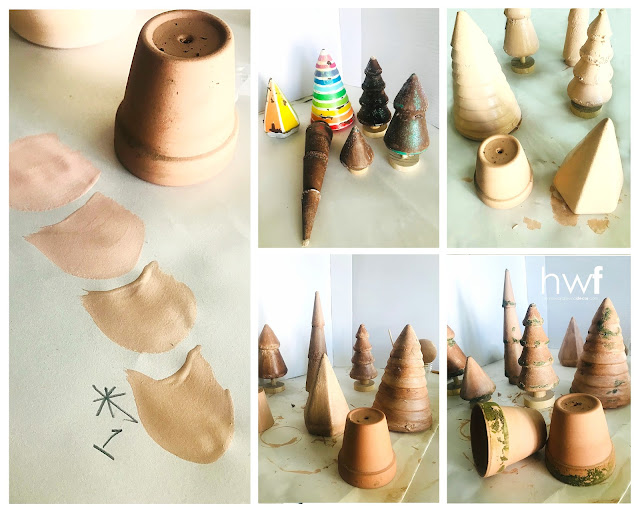
TOP TIP: It's important to mix enough paint for ALLLL of your project,
and keep it in a covered container so it doesn't dry out.
I mixed my terra cotta color paint before anything else...
the image on the left side below shows you how I kept mixing color in
until it matched the small un-aged pot from my collection.
Mixing white, orange, brown, with a few drops of pink & yellow acrylics
helped me to get the right hue:

top row, above:
I pulled the pom pom and rickrack trim off of the 'gingerbread' trees,
then soaked the ceramic ones in HOT water to get the glue residue & brown paint off.
The wood trees couldn't be soaked, but I pulled off all of the hot glue that I could.
Using a soft, flat brush, I covered every inch of the trees with the terra cotta paint.
Two coats covered all of the color and flaws very well.
bottom row, above:
I made a brown 'stain' in a small plastic cup:
1 teaspoon of dark brown paint and 4 teaspoons of water
Using a long-bristled soft brush, I painted the stain all over one section of a tree
by 'scrubbing' it into the painted surface.
Before it dried, I used a soft cotton towel to gently wipe the stain away.
(You can wipe or stipple, it's up to you)
I continued this until all of the trees had been stained -
then I put a second coat of stain on a few of the trees/sections
just to replicate the way terra cotta ages in varied tones.
OPTION:
If you don't like the darker brown 'aged' tones that this creates, skip it.
Instead, mix up a 'stain' with white paint and water, and use that.
You can even press some cornstarch or flour into the wet 'stain' before it dries
to give your project a dusty, aged look - in white!
the moss effect:
I mixed another 'stain' with brown paint, forest green paint, and a few drops of water.
This stain isn't a runny, wet glaze - it's thicker, easier to control.
I used a few small pots with REAL moss on them as a color reference.
Using a short-bristled brush, I picked up tiny amounts of this stain
and gently placed it onto the areas where the hot glue texture was visible.
After it dried, I went back and did it again for more contrast.
.jpg)
.jpg)
I can't capture the realism of the texture in a photo,
but I can say that it even wowed ME!
I love being able to replicate colors and textures with paint,
and this is one of my best faux terra cotta paint projects ever!
(And isn't it funny how what was a flaw - hot glue residue -
became the impetus for a better result than I had originally planned??!!
There's a life lesson in that, I'm certain...)
I mixed another 'stain' with brown paint, forest green paint, and a few drops of water.
This stain isn't a runny, wet glaze - it's thicker, easier to control.
I used a few small pots with REAL moss on them as a color reference.
Using a short-bristled brush, I picked up tiny amounts of this stain
and gently placed it onto the areas where the hot glue texture was visible.
After it dried, I went back and did it again for more contrast.
.jpg)
.jpg)
I can't capture the realism of the texture in a photo,
but I can say that it even wowed ME!
I love being able to replicate colors and textures with paint,
and this is one of my best faux terra cotta paint projects ever!
(And isn't it funny how what was a flaw - hot glue residue -
became the impetus for a better result than I had originally planned??!!
There's a life lesson in that, I'm certain...)
Now, I know that I didn't invent the idea of stacking pots into trees,
but I love being able to give a project special touches that make it uniquely MINE -
and I hope you are inspired to do the same!

Welcome to all who are visiting in December 2025 from Hometalk!
If you liked this project, you'll find ALL of my 2023
'terra cotta Christmas' theme content HERE

PLUS
Find all of my NEW 2025 'Mid Mod Holiday' theme content HERE

ALSO
click captions below to view these popular past holiday decor themes:
.jpg)

.jpg)

'Christmas Tree Farm' - 2024 'Happy HULAdays' - 2019
AND FINALLY....
ALL of my previous holiday content is linked on the right sidebar -
scroll down to the 'holiday decorating' section for categories,
and click to view all posts in that category.
shared online | 2023:
funky junk interiors | new upcycled ideas #703
thank you for featuring my project, Miss Donna!
southern sunflowers | home matters link party #457
creatively beth | team creative crafts linky party #173
faux finish,Christmas,painting,Christmas Decor Themes,thrifted,dollar store crafts,tutorial,re-purposed,Christmas Decor,holiday,up-cycling,terra cotta Christmas,terra cotta, terra cotta pots,garden pots,terra cotta trees,faux painting,faux terra cotta.

.jpg)


.jpg)
.jpg)
.jpg)
.jpg)
.jpg)
.jpg)
.jpg)


just a month after i posted this, Molbak's Home + Garden center has announced that after more than 65 years in business, they will be permanently closing in 2024. the news is shocking to everyone who reads or hears it, especially current staff. my heart is heavy for all involved and affected by this announcement - moreso by the situation that predicated it. the city of Woodinville will never be the same without Molbak's oasis.
ReplyDelete