after sharing an epic paint fail (and a fix!) in my last post,
i thought i should share another paint project - one that went WELL!
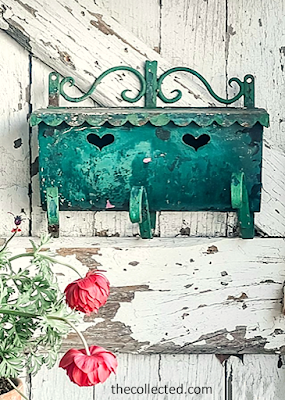
inspired by this photo of a rusty green vintage metal mailbox on Instagram
(courtesy of @thecollecteddesign on Instagram),
i grabbed a small vintage metal mailbox that i had found at a yard sale
and transformed it into a more beautiful mailbox - using paint.
yeah, i'm THAT kind of crazy, attempting this after a big mess!
but thing is - it worked. and it didn't just WORK, it worked out AMAZINGLY!
so, i'll share the steps i used to 'age' an already vintage mailbox -
including one of my 'top secret' (until now) faux finish tricks.
continue reading for all the details...
dwk
here's the 'before' - a plain black metal mailbox, circa 1940. TRUE vintage!
it's been sitting on the garage workbench holding paint brushes.
after a few steps of paint application,
plus a 'secret ingredient' i use to create a 'rust' texture,
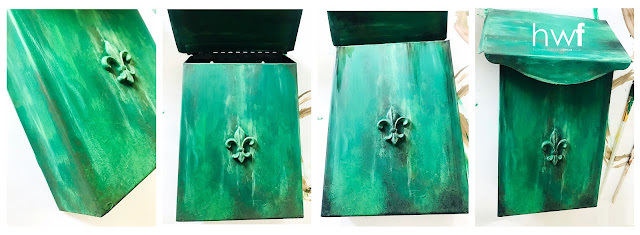
here's the AFTER:
here's the AFTER:
yep, that's FAKE 'age' and rust!
let me show you how easy it is to transform new(ish) into OLD...
let me show you how easy it is to transform new(ish) into OLD...
MATERIALS:
black, white, brown, and green acrylic paint . water
2 - 3 paint brushes with long, soft bristles
one paint brush with short, stiff bristles (like a small stencil brush)
2 - 3 paint brushes with long, soft bristles
one paint brush with short, stiff bristles (like a small stencil brush)
a clean item to paint (remove any flaking paint, dirt, etc.)
PROCESS:
this is the hard part of tutorials for me... because i just DO IT.
i put basic colors on my palette and then mix them as i go.
it's hard to tell you how, step by step, so my advice is to
squirt some green paint and black paint and white paint on a plate, then PLAY!
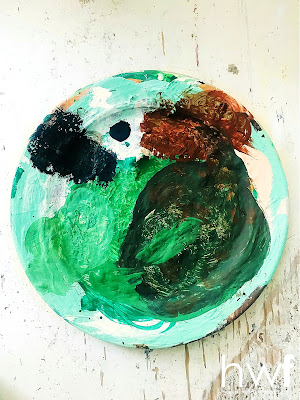
pick up a little bit of green and black and mix them for a deep tone -
brush some of that onto the object, in varied places.
pick up a little bit of green and white for a light tone - and brush it onto the object.
mix green, white, AND black for a greyed tone - and brush it onto the object.
this is the hard part of tutorials for me... because i just DO IT.
i put basic colors on my palette and then mix them as i go.
it's hard to tell you how, step by step, so my advice is to
squirt some green paint and black paint and white paint on a plate, then PLAY!

pick up a little bit of green and black and mix them for a deep tone -
brush some of that onto the object, in varied places.
pick up a little bit of green and white for a light tone - and brush it onto the object.
mix green, white, AND black for a greyed tone - and brush it onto the object.
mix two different shades of green to get a NEW green - you know the drill!!!
(ignore the brown paint on my palette - for now.)
(ignore the brown paint on my palette - for now.)
you can see the varied layers / splotches of different colors and tones i used...
there was no plan, no grid, no boundary. i just brushed paint on unevenly.
i DO work from dark to light tones, so it appears the way real faded and worn paint does.
TIP: use a thinned-down paint to 'drip' one color onto the surface
for another realistic aged effect.
i left some of the original black paint visible around the raised fleur de lis adornment,
and at some of the edges, to make the paint look more worn and dimensional.
next, we're mixing up some of deb's 'secret recipe'!
.jpg)
MATERIALS:
in a small plastic cup, combine cinnamon, nutmeg, ground cloves, and pepper.
no, we're not going to EAT it - we're going to sprinkle it onto wet paint!
you'll be re-using most of this spicy mixture as we go, so don't mix up too much to start with.
NOW is when you need some warm rusty-brown paint.
put some on your palette/plate, mix in enough water to make it a bit thinner than paint,
and grab the stencil brush.
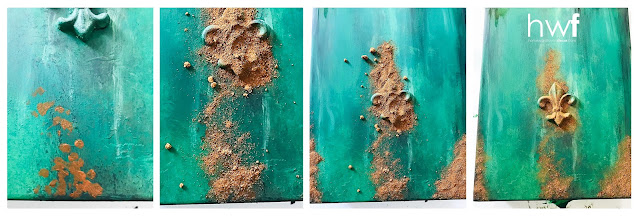
PROCESS:
dip an edge of the stencil brush into the thin brown paint on your palette,
and stipple it liberally onto one area of your surface -
starting with edges is easiest, as they would be where real rust appears.
until you get the hang of it, do one small area at a time.
before the thin paint dries, sprinkle some of the spice mixture onto it.
just let it sit there - don't touch it, don't brush it, nuthin!
move on to the next area and repeat the process.
i work on one surface at a time, to keep from smearing wet paint or not-dry spice mix.
first the front, then each side, then the bottom,
then the top, and then the inside top.
after about five minutes, pick up your item and shake it. or tap it on the table.
the loose spice mix that is NOT stuck to the now-dry paint will fall right off.
(i paint on a piece of posterboard that catches drips, splatters, AND spice mix!)
use a large soft paint brush to sweep the spice mix back into the cup,
and keep using it over and over.
the spice mixture adds texture to the 'rust' to make it realistic,
with the varied shapes and shades of the spices visible in the final effect.
if you've ever looked at real rust, you can see the bumpiness!
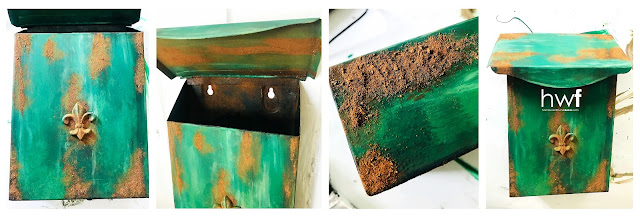
this shows you the placement of 'rust' on each surface,
and how random the areas are.
and yes, i painted some brown 'rust' on the INSIDE of the mailbox,
because i knew i was going to display it open -
and a plain black interior just didn't look quite right!
if you plan to hang your project outdoors:
get some flat finish clear spray paint, and seal the whole item.
this will 'lock in' the spice mix so it doesn't get wet and fall off
if exposed to rain, dew, or a kid with a hose ;)
when done and dry, i added some twine to hang it from for now
(i don't put screws or nails into my fence backdrop!).
then, i went into the back yard and grabbed some greenery -
the photinia plants that grow along our back fence
have tiny white blossoms each spring that smell just like honey,
and they worked perfectly for these 'after' photos.
(i don't put screws or nails into my fence backdrop!).
then, i went into the back yard and grabbed some greenery -
the photinia plants that grow along our back fence
have tiny white blossoms each spring that smell just like honey,
and they worked perfectly for these 'after' photos.
a lot of magazines show diy projects where something old
is painted to look new. that's cool.
but for me, adding age, character, and charm with paint tricks
to make a new-ish thing look OLD, well, that's just fun!
is painted to look new. that's cool.
but for me, adding age, character, and charm with paint tricks
to make a new-ish thing look OLD, well, that's just fun!
(ps: i have another project planned for fall, where i'll be sharing
ANOTHER way to create a faux rusty metal finish!)
related content:
faux concrete paint effect
faux 'beachy' weathered paint effect
faux terra cotta paint effect
ANOTHER way to create a faux rusty metal finish!)
related content:
faux concrete paint effect
faux 'beachy' weathered paint effect
faux terra cotta paint effect
decorating,vintage style,farmhouse style,thrifted,colorful home,diy decorating,up-cycling,spring,re-purposing,DIY,painting,vintage,tutorial,re-purposed,faux rusty metal paint finish,paint tricks,faux finish,faux rust paint effects.

.jpg)
.jpg)
.jpg)
.jpg)
.jpg)

No comments:
Post a Comment