. -->

7.13.2013

FREE Weekend Makeover: Part 3

Welcome to Part 3 of my FREE Weekend Makeover!

How to refresh, restyle, and redecorate 
without spending a CENT -
by using what you already have!

We're at the halfway point!
You've seen the deck and patio, and the living room in previous posts,
and now it's time for
The Dining Room!
Before:
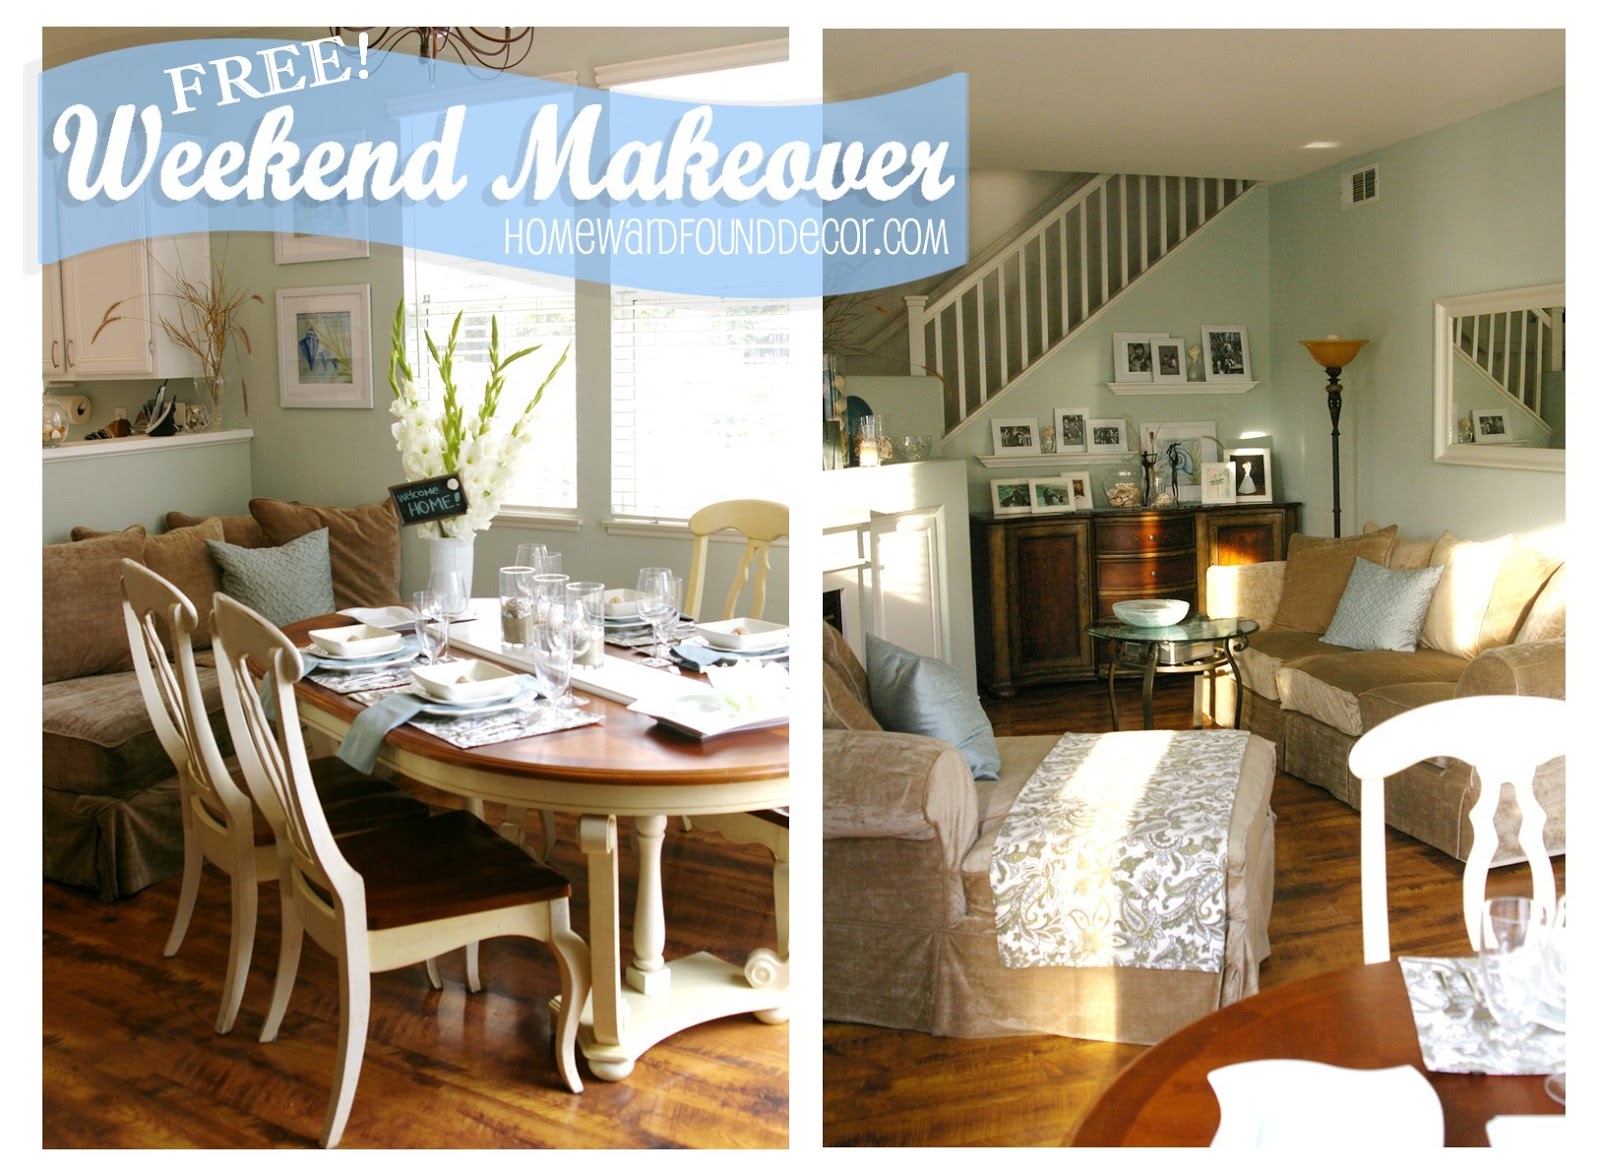
The dining room is located to the right as you view the house from the front entry,
but it's actually part of the main living space.
That large modular sofa was blocking it off from being used to all of its potential, though.
[You saw in this post how I rearranged the sofa sections to open up the living area...
and you were probably wondering 'Where's the other sofa section?']

After:
Here's the other sofa section!
The armless unit [from the center of the old 'U'-shaped sofa] has been moved to the dining area.
Why? Because it helped open up the living room to get it out of there.
And because this wall was screaming for something on it.

And because this piece of furniture here gives the dining room more uses:
*You can still see the television from here, so it's a great lounge space.
[Ask my brother. He loves it!]
*You can participate in conversations in the living room.
*You can move the table over and this section creates two extra seats -
so the table seats six instead of just four -
which also works well for working on home work or a laptop.

And  because by putting it here, I've created another area
where one of two preteen girls can sit with a book, a Kindle, or an iPad
and not be sitting right on top of her sister all summer long
[one on the chaise in the living room, one here -
WAY better than fighting over corners of the old 'U'-shaped sofa!]

That's a LOT of value added 
by simply scooting one four-foot sofa section across a room!
Remember, you have to SEE THINGS DIFFERENTLY!

continue reading to see MORE of the dining room - and kitchen!

7.11.2013

FREE Weekend Makeover Part 2


Welcome to Part 2 of my FREE Weekend Makeover!

How to refresh, restyle, and redecorate 
without spending a CENT -
by using what you already have!

You know those 'BIG REVEALS'
that all of the home improvement & decor shows do on HGTV?

I don't have a bus. Or a bullhorn.
[I smile at that reference to Ty Pennington,
 because I was lucky enough to be a part of Extreme Makeover Home Edition
when it filmed in Washington state years ago - at the Dore Family House in Kingston]

So in lieu of being able to swing the front door open wide, and say
"WELCOME HOME!",
like I did for my brother, sister in law, and nieces when they returned from their vacation,
I am going to welcome you via photos!
In the MANY photos to come, 
the 'Before' shot is on the left, and the 'After' shot is on the right...

continue reading to start your tour...

7.09.2013

A FREE Weekend Makeover!

How to refresh, restyle, and redecorate without spending a CENT -
  by using what you already have!

Last week, my brother and his wife & daughters headed out of town on vacation.
I house-sat and pet-sat for them. Oh, and I also gave their house a total makeover!
[Hello, I am Deb. And I am a Decorato-holic.
After 35+ years as a retail display stylist, I should be!]


This project is a perfect example of my HOMEWARDfound decorating philosophy:
Re-think what you already have on hand to make your home look terrific!
And even as I was decorating their home,
I was thinking about sharing the process with you in this WEEK LONG SERIES
...

Let's start OUTDOORS, shall we? 
Here's the front deck,  
which is the first thing you see when you enter the yard. 
[I have no 'before' photos of this deck, because I was in HYPERdecorator mode and FORGOT -but I can tell you that there was just a firepit, and four chairs with four pillows sitting here.]

The 'found' items that I added here are the umbrella and the table.

The beach umbrella was shoved in the garage, so I just hauled it out and set it up.
[there are two tan umbrellas over on a nearby patio, and this perfectly echoes them]
The wood table was on the side of the house. Unused. Beige. And kinda' dirty.
So I painted the table with the white exterior trim paint on the house (can was in the garage).

The succulent plants in 3 pots had been placed at the front edge of the deck,
where you literally walked past them without seeing them.
By moving the two small pots onto the table, and the large pot next to the chair,
the plants add softness and life to this exterior 'room' and bring it to life.

The pillows were already here, and they work perfectly to connect the color scheme to the home's interior.

Next Up: the patio
It sits closer to the house, located in the front and side yard.

continue reading to see what else I did!

7.04.2013

Long May She Wave

I'd to share a story about the American Flag...
or rather, my own collection of American flags.

I have several of them.
One is an old boat flag, hand-sewn, with embroidered stars,
which formerly flew on a Chris Craft yacht. (Hopefully on Lake Tahoe)
There are a few others that aren't valuable, or special,
but have been flown with love and pride by me - and by people before me.
Because I bought them all at thrift and vintage stores.

One has a tattered hem - and yes, I still use it inside my home.
Please don't preach to me about 'the flag code'.
That tattered flag may have flown at the home of a veteran.
It may have hung on the wall of an immigrant family for generations.
I don't know the actual history of that flag, but it has one.
It shows the signs of being hung with pride for many years...
and I think it has more value with a tattered hem
than any brand new flag imported from China.

It reminds me of the flag
that Francis Scott Key described in one verse of our national anthem:
"And the star-spangled banner in triumph shall wave
O'er the land of the free and the home of the brave!"

It survived a battle. And kept on waving. A sign of strength and courage.
It certainly wasn't clean and pressed and without tears, rips, stains, and holes.


I don't think something that has been used and loved, and that still stands for something,
should be burned or buried just because it's not 'perfect' anymore.
I don't believe that there is only one way to show patriotism.
Or one way to display a flag with honor and pride.
That's my personal belief.

This story is about what my son DID with my flags.
And the memory of it means something to me, and says something to me,
about the man he was becoming and the immense pride for this country
that runs in his bloodline. In MY bloodline.
Because you see, George Mason is my ancestor.
He was the writer of the Virginia Bill of Rights - which were incorporated into
the Bill of Rights for our fledgling country back in 1775.
I possess pride and gratitude for the part he played
in founding this country of ours.
I display my collection of flags with reverence for that contribution.
In remembrance of my grandfathers and uncles who served in the Navy,
and my dad who served in the Marines.
And though my son has not served in the military,
he did something heroic that I honor each time I hang my flags...
__________________________________

click the 'read more' link for the story...

7.02.2013

It's All In the Details...

I am smack in the middle of a residential decorating project 
(and you BET I am photographing it for future posts!)
so today I am sharing some of my images of past Fourth of July & Summer decor...
where the simplicity of small details makes all the difference.


6.29.2013

Custom Water Bottle Labels

Here's another of my 'Fast, Cheap & Easy'TM decorating ideas -
just in time for your weekend picnic plans!

All you need are your water bottles
and latex balloons in a color and theme that matches your party decor.

Cut off the top round part and the lower round part & neck of the balloon
as shown in the image above
then slide the MIDDLE section of the balloon over the water bottle.
[remove the paper label from the bottle if it will show]

... and just like that, you've got customized labels!

I haven't seen these anywhere else (and I looked)
so I am claiming this as an ORIGINAL idea!


shared online:


funky junk interiors |  new upcycled projects to make #584 (2021)

6.27.2013

Easy Bandana Banner

Party Banners seem to be everywhere...
and while I know that it's not THAT hard to cut and glue or sew burlap or canvas to make one,
there's a SUPER EASY way to get this effect in no time at all...
and you'll be able to use the materials in other ways when you are done using it.
Getting double use out of decor elements? LOVE.

continue reading for my EASY version of a banner, 

made with Bandanas from the Dollar Store!