. -->

12.05.2012

Embellished Gift Wraps

add a handmade touch to your gifts this Christmas  
by embellishing them with re-purposed materials!

these gifts were wrapped with paper that has a sweater print 
(from an old line by MODA Home called 'fUnKy MoNkEy'!)
and then embellished with vintage trims...
detail shots below:
 a lace doily evokes snowflakes
and a tiny grass nest with vintage flower petals adds a touch of real nature.
 Vintage lace and a sweet carnation pin made from vintage fabric (re-usable!) stand in for a bow
[similar pins available from Rose~Marie Designs]
pinwheel posies are made from the edges of canvas painter's tarps, rolled & glued.
attach to a gift with glue dots, over a piece of Christmas sheet music.
[this makes a great solution for gifts to be mailed - no bows to squash!]
feminine vintage trims make for luxurious wrappings...
wrap a gift IN a sweater!
sew an 'envelope' from the body of a sweater, pop a gift box inside, and safety pin the top closed.
On top, a pouffe of beautiful ribbon or trim, a satin bow, and a bling-y rhinestone clip.
rosettes are made from cashmere sweater arm cuffs. just roll up and stitch to hold.
attach to gift with a drop of hot glue. 
the perfect accent for a sweater is PEARLS... dripping on top of the gift like a tree garland!
sometimes very simple materials get BIG results: 
Sew an envelope from canvas, and tuck in vintage sheet music or a favorite magazine.
Fold closed and tie with vintage trims - like velvet ribbon or seam binding and a canvas flower.
 
for a more rustic masculine look, combine burlap and twine (from the hardware store!). 
a vintage belt buckle on it's original sales card adds more texture.
 
making use of vintage trims not only makes for beautiful packages that save resources
[including your MoNeY]
 but they also offer a 'bonus' re-usable gift to the recipient: a pin, flowers, a nest, ribbon, pearls.... 
take a peek in your junk drawer and craft closet, 
and see what you can find to embellish YOUR gifts this season!

 this post and Monday's post are companions to my article in
the 2012 Holiday issue of Creating Vintage Charm Magazine 

12.03.2012

Wrap It With Style!


To be a top-notch guest at Holiday parties, 
always bring a thoughtful gift for the host/hostess
and wrap it with STYLE!
 
Here are a few ideas that coordinate with my current story
in Creating Vintage Charm Magazine
 the Holiday 2012 Issue is available in print HERE
 Giving a lovely bottle of wine, port, champagne, or liquor
is an elegant way to thank a host or hostess for inviting you...

*Make a 'sweater cozy' for decanters and wine bottles - simply cut the arm off of a lovely sweater, and scrunch over the bottle. Tie a bauble around the bottle's neck for a finishing touch.

*Use a stocking as a wine bag! Tuck a bit of tissue into the toe of a stocking, then sit a bottled beverage inside. With a snippet of greenery or more tissue at the top, it's charming and re-usable!

*Simply wrap a bit of burlap, linen, ticking, or other fabric around a bottle (double-stick tape works really well) and then tie with twine. Add a vintage earring or brooch for some bling to dress it up!

Here's a foolproof 'gift bag' idea:
 Tuck a bottle into an old cowboy boot, and add a cushion of burlap.
Perfect for any man or woman with 'cowboy chic style'!

Since we've all seen the 'coffee can as cookie container' trick,
I have a few new ideas for that, as well:
*Simply tie some rustic twine around a silver can for an industrial look. Add a tag made from an old spoon.
 *Make a sweater cozy for a can - cut off the arm of a sweater and sew one end closed. Scrunch it over a can and tie the top with a bow made from vintage lace.
*Vintage metal containers are still a stylish way to present baked goods!
Find them at thrift stores and antique shops,
then add a seasonal detail like a small burlap wreath.

Coming Up: more from my current Creating Vintage Charm article...
Stylish Wraps for Gifts Under the Tree!


11.30.2012

Warm Up With a Scarf Wreath!

over the years, i've grabbed whatever is at hand (or, um, on the floor...)
to create interesting and personal decor for my home each season -
and that's REALLY the case for the Holidays.
an old wreath form gets a new lease on life around here quicker than you can say 
'Fast, Cheap, & Easy'!TM

above and below are two of my own wreaths,
and let me tell you - making them is SO SIMPLE!

here's a quick tutorial:
1. grab a foam or straw wreath form (new or used)
2. find a knit scarf or two (new or used)
3. pin one short end of the scarf to the top of the form (use long straight pins)
4. wrap the scarf tightly around the wreath form, pinning as you go.
5. when you get to the end, pin in place.

if it's a big wreath form, you'll need more scarves. 
hit the dollar store or goodwill for cheap and colorful materials!
you can add whatever you want to embellish the wreath


for the soft knit wreath above, i used burlap and vintage ribbon to make a 'bow' 
then added a bling-y 'blessing' ornament and a vintage crystal.
 [the wreath is hung on my screen door from a woven grass belt!]
 for this one, i used a knit scarf with fun fringed ends.
when both ends met at the top after wrapping it, i foofed the fringe out
and added a vintage ribbon and a flower made from an old chenille stem.
a simple piece of heavy cardstock offers a welcoming message.
 this one is made up of a super-long scarf that i made out of sweater remnants,
tied with a bitty 'scarf' (another remnant), and a felt snowflake ornament.

find my scarf wreath tutorial here

 mine are simple, because that's my style.

now, there are some other gals out there making some drool-worthy wreaths
out of scarves, sweaters, and felted fabrics...
get a load of these!


all three of these brilliant ideas are from the amazingly talented Betz White!

how about this beauty from Bloomsbury Loft!

i met owner/designer Judith last May at the Springfield Ohio Antique Show,
and was instantly delighted by her colorful palette and playful creations. 


this one is from RecoverGirl  - and her post is a tutorial!

in the course of research for this post, i discovered that 
the tv show CRAFT WARS actually had a challenge for contestants
to make a Christmas wreath from old sweaters!


Margot Potter was one of the contestants on that episode,
and she's sharing her considerable talents 
for creating this yarn-wrap wreath in a tutorial on her blog!

are you inspired yet?!

go ahead - grab some of those old funky Christmas sweaters hidden in the attic
(yeah, the ones that look like Bill Cosby wore them in the 80's)
and make some colorful flowers for your knit scarf wreaths!

11.28.2012

Fresh & Green Holiday Decor Ideas!


to follow up the fabulous SnoWONDER-ful Giveaway last week,
i thought you'd like to see a few more ideas for using it in your Holiday decor!
above, a vintage glass pie plate is filled with sno-balls made from the magic SnoWonder faux snow. 
yes, they hold their shape like that - and are still wet and 'cold'!
they look absolutely real - except you can't do THIS with real snowballs:
 what else can you do with SnoWonder faux snow?

one year for Christmas Eve dinner,
i placed a scoop of sno inside my collection of vintage Santa mugs
and used them at each placesetting:
 i like the simplicity of the sage green ornaments hanging from the chandelier on spiraled pipe cleaners, too.

btw, my spiffy white Santa mugs started out just like the ones you see in antique shops - red and white. 
i just soaked them in hot water and soap, then used an old credit card to scrape off the softened red paint.
it was an easy fix to stay true to my own style!
i am a big proponent of using ornaments all over the place - not just on the tree.
[when the tree is full, you gotta' stop.
but when you fill other containers with them, you can keep going!]
in the photo above, you see a HUGE aluminum pedestal punch bowl filled with a mound of SnoWonder,
and various ornaments nestled into the snow. 

TOP TIP!
see the white, chartreuse, and silver bell in the photo?
it has no back. really. it was broken when i bought it. 
nestle broken ornaments or figures into snow, or glitter, or greenery,
and no one will ever see the back and know that it is not a perfect vintage treasure.
 a clear glass footed bowl also plays host to SnoWonder and some ornaments.
mixing up the ornament sizes, patterns, and shapes makes for an interesting display.
the monochromatic palette of white, silver, and clear neutrals
is invigorated by the shades of green: evergreen, celadon, sage, and chartreuse.
 a white ironstone platter with a huge crack in it 
is still able to serve up a healthy serving of ornaments on a bed of fresh Sno!

since SNOW was the major theme of my Christmas decor that year,
it carried into other ways to bring wintery delights inside.
i mixed clear glass, silver, and white neutrals
with some fresh green colors for simplified style...
 with a soft color palette and not a lot of 'stuff',
the whole look is clean, spare, simple, and spacious...
in a 900 square foot Cottage, keeping it spacious was important! 
i used a fake tree, with mini white lights and strands of large white light bulbs.
sadly, the large bulbs ended up BLINDING anyone who looked at the tree at night!
so I took some polyfil stuffing and placed a 'pouffe' of it as 'snow' over each bulb to soften the brightness.
[NOTE: these were NEW bulbs and burned cool - 
please DO NOT place anything over old or hot light bulbs!]
 i also used large plastic glittered snowflakes on the tree [with one as a topper]
an abundance of white and silver glass ball ornaments in various sizes and finishes
and some funky paper ornaments with glittered designs....
they were gift tags that i bought at a paper supply store on clearance!

[if i were to replicate this look NOW, 
i'd use manilla tags stamped with a green inked design instead]
 on the mantel, glass and silver containers were grouped on either side
and filled the glass vases with MORE ornaments in green, white, and silver - 
i love doing this - it's so easy, and keeps ornaments from breaking!
some pine boughs and white mini lights finish it off.

i also made some fun poinsettia-like flowers
from vintage pipe cleaners and silver resin mini-ornaments.
[i am looking for more of those shaped pipe cleaners
and will put together a tutorial for you soon...]
the flowers sit in a tall silver florist's bucket, with some greens, a large ornament, 
and some dripping silver glass garland.
i like them a lot better than real poinsettias, but those would look lovely here, too.
especially the 'Limelight' variety with bright lime green bracts. 

it didn't take a lot of 'stuff' or money or even time to put this look together - 
just a fresh idea, the color green, and Snow!

 click HERE to visit the SnoWonder website

11.26.2012

Break the Christmas Color Code!

Todays' post comes to us from Lisa Maughmer,
Lifestyle Editor at BROADWAY+THRESHER Magazine.

Lisa is also the proprietor of the vintage boutique Urban FarmHouse in Thornville, Ohio, and has been selected as one of Romantic Homes magazine's 'Romantics' design & style leaders.

Lisa is sharing some fresh 'new country' decor inspiration with us, to show us how unexpected color choices in our Holiday decor can bring BIG results... enjoy!

In my dining room, I let the cupboard choose what "dress" she wanted to put on for the party this year. 
While her main color is a sea foam green, she has many layers. Gray, teal and cream all can be seen peeking out here and there so it was decided: silver, faded blues & greens, tarnished glitter and "dirty" ironstone. 
This fabulous cupboard is dressed quite simply for the season's soirees. 
Plates and bowls are still available for use without being buried (and make your everyday items serve double-duty as decor! ~ Deb) Gather up your collections of ornaments to fill up your bowls and tureens. It's quick and easy. You'll be ready for the shopping, baking and entertaining in no time!

 Pieces of drippy, mica dusted snow add the crowning touch, like the icing on a cake!
Don't pass up those pieces of ironstone at your favorite haunts just because they don't have a lid! 

You can usually pick them up at a pretty fair price, and once they are filled with collections of old ornaments, their beauty will shine through. (Who says ornaments can only go on a tree, anyway? ~Deb)
Rustic and well-loved ironstone bowls are overflowing with heirloom ornaments in shades of blue, cream and green.
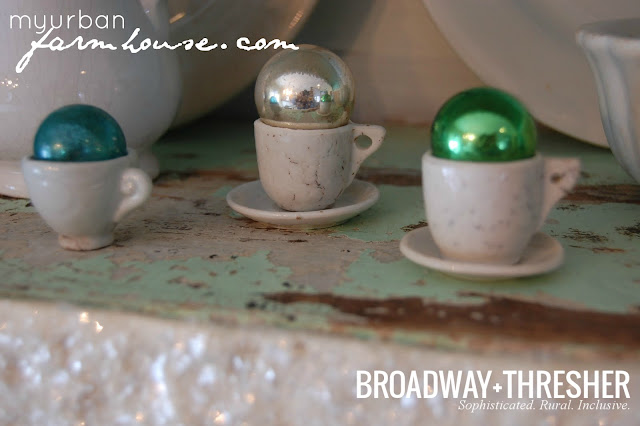
Petite ironstone teacups serve up sweet treasures: They are perfect for holding a vintage feather tree glass ball.
Tuck loose ornaments into the of cupboards and shelves. Mismatched shapes and colors add more interest, and even the Christmas Eve mouse is taking a peek! (EEEEEK! ~ Deb)
 

Grouping like colors together makes a collection stand up and get noticed. Even a cast off glass door knob becomes a festive bauble.
 
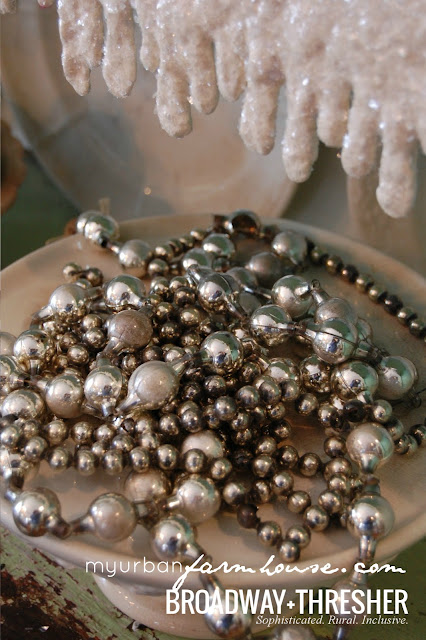
Garland doesn't always have to hang on the tree. It's perfectly content piled up on this cake stand. (It also looks FABulous heaped into glass candy dishes! ~ Deb)
'One-sies' can add charm to any vignette:
A lone (but stylishly glittered) deer stands guard over a single vintage ornament. 
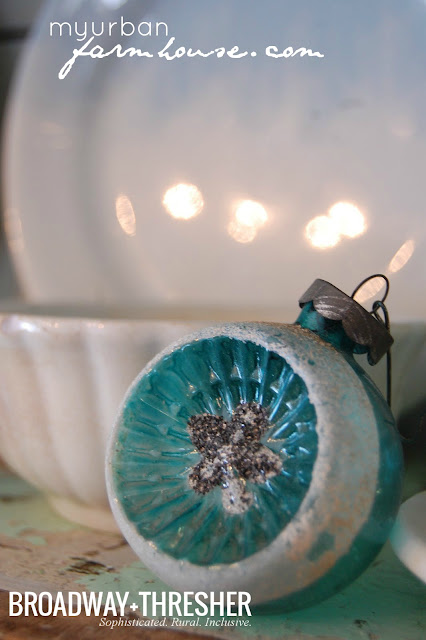
Below, a charming ornament gets the spotlight


Thank you, Lisa! Such great inspiration for the Holidays!

Remember, Christmas is not all about red and green... it's about making your rooms festive, comfortable, liveable, and memorable for you and your guests. Pull colors from your 'everyday' palette, or bring out a special collection of china, glassware, or linens and let them drive your color choices this year. Just a few touches of a fresh color scheme will make your holiday season bright...

11.19.2012

Front Porch Holiday Decor: Raid the Garden Shed AGAIN!

when you drag out the holiday decorations, what area do you decorate FIRST?
i'm a front door / front porch kinda' person. 
i figure if you begin by creating a warm seasonal welcome at the door,
everything else you do looks that much better!

OK, i'll fess up...
i also think that if your front door / porch is decorated the day after Thanksgiving, 
you blow your neighbors away. 
you win the neighborhood 'who gets their lights and wreath up first' contest.
even if the inside of your house looks like a tornado hit, you look like superwoman!
so, let's start at the front door!

in THIS POST back in August,
i shared photos of my fall front porch: 
well, the decor you see in the photos in today's post is based on the SAME elements used back then:
stuff from the garden shed!
 the galvanized buckets, watering can, and plant stand all stayed in place for the Holidays.

after removing the fall grasses, leaves and pumpkins,
i flipped over the bottom bucket, and then filled all of them up with greens
that i cut from our trees.
the details include a little miniature tree [fake],
pinecones, a birdnest, a banner & burlap stocking that i made
 and
one very cool vintage light globe nestled into the top bucket of greens
is lit from within [night light bulb] to add a soft glow at night.
it looked like a glowing white snowball
and regarding those greens....
you're going to want to pay close attention here, 
because this is my NUMBER ONE 'TOP TIP' for Holiday decorating on the cheap!

HOW TO GET FREE GREENERY:
stalk the landscapers in your neighborhood. 
know when they come - not just to do YOUR yardwork,  but the neighbors. and the common areas.
take them a plate of cookies
[why, yes, i AM suggesting that you SCHMOOZE them!]
and then ask them for some cuttings...
evergreens, pine, fir, cedar, boxwood, magnolias, bay laurel, cypress -
no matter where you live, there are always bushes, trees, and hedges being trimmed.
FREE MATERIALS!

just ask them for the greens before they load it all into their chippers or trucks.
 you will be saving them money when they go to the landfill, so they usually always hand over the goods.

if you live in a rural area, always make sure you have permission to be on the property to cut boughs.
and don't steal them from your neighbor's yard at midnight ;0)

i have been known to pillage greenery from abandoned warehouse complex parking lots
but i am not recommending that YOU do that!

ok, back to the porch...
there was also a very long wood bench (made from an old headboard)
that i cozied up with a huge burlap pillow and a bagful of 'gifts' - 
really just simple boxes tied with burlap & ribbon.
between the bench and the door, there's one of my old folding wire shopping carts,
filled with greenery.
an old snowsled leans against the wall behind the cart, 
and an old brown umbrella is a fitting final touch for the Washington winter weather. 

i didn't buy anything to decorate with -
i just combined things i already had to create a mood.
the white, brown, green, and gray color palette
made for a serene setting that coordinated with the beach house,
and it welcomed neighbors, friends, and family well into January, too...