. -->

8.06.2013

Dresser ReStyle - with Canvas!

 While HOMEWARDfound is generally about seasonal decor ideas,
sometimes I like to pop in 'Fast, Cheap & Easy' TM ideas for furniture, too...
totally do-able projects for you, some from my previous business [RETREAT].

This dresser was found on the curb, for free, back in 2009.
With lines like the ones on those drawers, I couldn't pass her up!

The case was solid, but the veneer on top and on the drawers was just wrecked.
No amount of putty and paint was going to make her presentable...
she went beyond needing mere 'makeup' into the realm of 'plastic surgery'!

While I was sanding her down, I had a brainstorm...

The dropcloth that she was sitting on in the prep room had some great texture.
I looked at the drawers, and then at the dropcloth, and that light bulb went on:
I would cover the entire dresser with a new canvas dropcloth!

Dropcloths are a great way to get a LOT of fabric for a ridiculously low price
and they come in many sizes and weights. 
I used the heaviest weight for this project, which covered up all of the 'blemishes' in her complexion.

continue reading to see what i did!

8.03.2013

I Have a Sink-ing Feeling About This...

Here at HOMEWARDfound, my goal is to provide you with as many ORIGINAL ideas 
and as much seasonal inspiration as I possibly can. I'll go to [almost] any lengths to do that.
Heck, I'll even throw in the kitchen sink!

 In my 35+ years of designing and styling home decor and retail displays, I've come up with some whopper ideas.
But THIS one is one of my faves - and it was a mistakeuh huh. a total fluke. great story, too.
But you don't want the story, you want PICTURES!
BRILLIANT IDEA, right?!!!!! thank you. thank you very much.

[it's really not brilliant... scroll down to the end of the post and read the story]
Perfect in your store or show displays. Or garden. or... while GLAMPING!

My friend Marybeth ended up with that sink for her sweet shop poppyseeds,
and did exactly the same thing with it.
[That shot on the left above was taken at her store in Washington in June!]
She also did something similar with another sink she has:
Can you say CLEVER?!
Long before Marybeth took my sink to her store, 
and before I sat it on that cart, I used it on top of a pedestal:
The top of the wood pedestal was hollow, so the sink fit right on top perfectly.
The addition of a bucket full of herbs was a charming touch, outside the entrance to my farm store.
I later added lots more buckets of blooming flowers & herbs...
Here's a shot of the whole storefront while it was being worked on:
That was a huge (tall, deep) garage, turned into a store on my farm on an island.
The barn door on the left and the double doors on the right replaced the regular garage door,
for a much more welcoming entry. The awning up above was found for $10 bucks at ReStore -
and it was a perfect fit down to the last inch. Some things are meant to be!

I miss it, and wish I was still there on my farm with my store and my show...
but then, some things are NOT meant to be
It was all dismantled when we moved out. The barn door now lives at a neighbors' house.
It looks like a garage again. (BOR-ing)

I've used some other sinks in displays, as well...
 *The sink on the left is a double-bowl + countertop unit that topped a bank of vintage metal cabinets.
I filled one sink with white holiday ornaments (that looked like soap bubbles!)
and it held white milk glass & ceramic dishes in our booth at the Farm Chicks show in 2010.

* The sink on the right is sitting on two wood sawhorses (out of the photo),
and holds the same holiday ornaments and clear glass dessert plates & cups
at the snack bar area of our Petite Retreat Summer Market in 2010.

What do I always say?
Don't think literally about the stuff you have. Move it around.
See it differently. Use it in a way it's NOT supposed to be used!

Sinks aren't just for kitchens and baths...
They are great in store & booth displays, and even in the garden!
I would NOT, however, recommend using toilets for those purposes. [wink]

ok, NOW here's the story of my sink:
I was at a vintage show, unloading the trailer, setting up the booth with furnishings and accessories
and I needed to move the vintage enamel sink from the trailer across the parking area and to the booth.
And I was tired. I didn't want to carry it. (those things are HEAVY) so....
I plopped that sink on the top of a folding wire cart that I had stuffed with burlap fabric in the trailer,
and then I rolled the sink over to where I wanted it - which was in a chair.

But when I looked at the cart, and saw the sink sitting there, and realized that it was TOTALLY secure 
because the sink's apron was wrapped around the top edge of the cart
and that it was awfully darned easy to maneuver it around like that, 
well, the proverbial LIGHT BULB went on over my head:

Leave. the. sink. on. the. cart, Deb!

I grabbed the burlap and wrapped the outside of the cart with it
- and that, as they say, was that.
BRILLIANT IDEA. from outta' nowhere. Gotta' love it!

7.30.2013

Summertime Blues: DIY Party Decor


It doesn't take a lot of work or money to put together beautiful decor - 
and these simple decor suggestions for a summertime party will help you do it in style
without spending a lot...

Let me share a few tips and photos with you
from one of my own summer dinner parties in my yard:
Greet your guests with style:
This pretty floral arrangement sits on a table just inside my front garden gate...
It's where the appetizers and wine were served as guests arrived,
so I wanted to set the tone of the party right at the entrance.

The color scheme is established with the appearance of blue hydrangeas,
tucked into a collection of enamelware pieces. 
The vintage enamelware buckets and dishpan with lid stayed out on the patio all year long, 
changed up with various flowers and fruit/vegetable displays to suit the seasons.

Having go-to containers for quick decor changes is a smart idea for easy decor.

continue reading to see more easy decor ideas!


7.27.2013

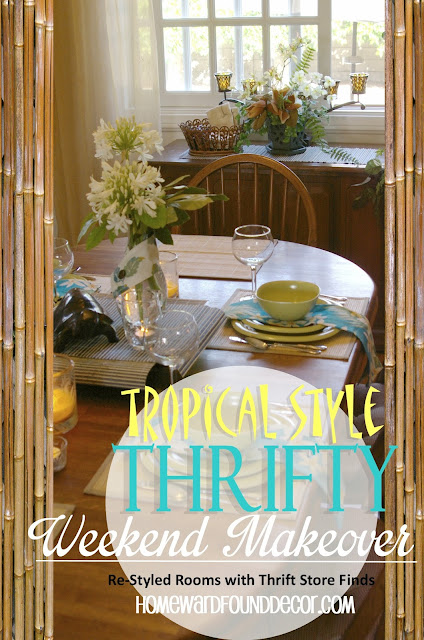
Thrifty Weekend Makeover: Part IV

Welcome to Part IV
of my Thrifty Weekend Makeover, 
where we're Re-Styling Rooms using items found in the house
and adding some thrifted elements!

 You've seen the backyard patio, the family room, and the wine bar and guest bath...
In this final of four installments, you'll see the
 Living & Dining Room Reveal!

Let's start at the front door...
The grapevine wreath that was hung on the family room fireplace is now on the front door.
I left the greenery on it, and embellished it with some easy accents:
two small bunches of faux orchid flowers, a little pair of zorie sandals
and a small beach sign [all from Dollar Tree
introduce the turquoise/brown/green color scheme and the tropical theme.

Talk about 'Fast, Cheap, & Easy'TM - this cost four dollars and took all of five minutes!
continue reading to continue your tour...

7.25.2013

Thrifty Weekend Makeover: Part III

Welcome to Part III of my Thrifty Weekend Makeover, 
where we're Re-Styling Rooms using items found in the house
and adding some thrifted elements!

In the family room reveal in my last post, I hinted that there was something around
THIS CORNER
 that I was REALLY excited to share with you!
So, just peek around the right side of that wall with the hat and clock and straw bag on it...

 BEFORE, you would have seen THIS:
It's a regular-sized closet, refitted years ago to hold wine accoutrements 
(glasses, wine-related picnic ware, 2 small wine fridges, etc.) 
as well as the LARGE oak leaves for the dining room table.

 Well, that just didn't go with the Tropical theme, so I got busy...

 I took down the curtain, emptied everything out of there, and then painted it.
This paint is the wall color from the living & dining rooms in the house,
and I used half a gallon of it that was out in the garage.
[it took THREE COATS to cover the raspberry red!]

You can just see the edge of a mural on the garage door before
I painted that out, too - the trim is now white and the wall & door are tan.
[it's okay - I painted that mural back in 1991. I've hated it ever since.]

Then I put everything back in the closet, starting with the two wine fridges 
and the table leaves... only I laid one of the table leaves on TOP of the fridges, 
creating a totally usable counter area that wasn't there before.
And then I decorated it!


If you're ready to see what it looks like NOW, continue reading...

7.23.2013

Thrifty Weekend Makeover: Part II


Welcome to Part II of my 
Thrifty Weekend Makeover!

I have some really GOOD NEWS for you:
This just expanded from a 3 part to a 4 part series

I have so many photos to share, I can't fit them all into 3 posts!

When I began this house restyling project for my parents,
I assembled all of the items that I had found in cabinets and cupboards and closets,
 and then went to several thrift stores to pick up other items to use.
Here are some of the main elements and accessories that I used:
The items shown here are split just about 50/50 between what Mom already had
and what I purchased at thrift stores, ReStore, and the Dollar Tree store.
I also found more items in the house to use as I went along.

The Tommy Bahama-inspired tropical theme 
came from my parent's love of Hawaii and their turtle collection
and the color palette grew out of Mom's love of the color turquoise.

I wanted to incorporate her preferences into her rooms - but not overwhelm them with bright color.
Hues of aqua, turquoise, and teal are used in transition through different rooms to connect them,
and are grounded by warm neutral brown tones.

In Part I, I started this tour backwards - from the patio in the backyard -
so today, we move indoors from there for the

Family Room Reveal!

continue reading to see what's just off the patio...

7.21.2013

Thrifty Weekend Makeover: Part I

 Yes, it's another weekend makeover project!
Everyone seemed to enjoy my LAST makeover project so much,
that I thought I'd share this one with you!

This makeover actually preceded - and INSPIRED - the one you saw,
because when my brother and my sister in law saw THIS makeover, they wanted one, too!

 This makeover wasn't entirely FREE - I bought some things at thrift stores to complete it,
so I'm calling it the THRIFTY Weekend Makeover!
 The home, which belongs to my parents, started out kind of Tuscan. And also Beachy.
which was, honestly, confusing...
It now has a very Tropical, Tommy-Bahama style... but I'm not to that part of the story yet...

This makeover actually started with a backyard project:

My Mom was kind of fed up with the aged, faded bamboo fencing on one wall.
My Dad, not really wanting to replace it, remembered a TIP from a friend who lives at the beach:
if you put shellack over old bamboo, it will bring out the original color again.
I doubted this. So did my mom.
But Dad grabbed his can of shellack and got to work - and VOILA! It worked!
[so I grabbed my camera for a 'before' shot, because he was movin' FAST!]
Great results, huh?! It really made a difference.
And I have been instructed to say that Dad is A GENIUS for remembering that tip!

So, you know how backyard projects go, right?
You do one thing. And then you think 'Well, since we did THAT, we should...'
uh huh.

continue reading to see what happened next...