. -->

hello! don't miss all of my sidebar content - click 'view web version' on your screen!

Showing posts with label on the porch. Show all posts

2.27.2014

Serving Up Blooms at the Garden Bar

this is the one where Deb turns a folding patio bar into a potting bench!

I use everyday items in ways 
that no person in their right mind would ever think of or attempt...
this is no exception to that rule.

last weekend, my mom was struggling to pot up some plants for her backyard
on her glass patio table. Not the optimum surface for messy work. 
and for my mom, still recovering from back surgery, not the optimum height, either.

not five feet away from her, against the house, stood a folding outdoor bar.
[sitting there, unused, except for large parties once or twice a year.]
only I didn't SEE a bar. I saw a Potting Bench! 

i quickly dragged it over to the edge of the patio, against a shady vine wall,
set it up, gathered a few accessories and gardening staples,
and the 'Garden Bar' was born:
the metal and mesh folding bar is the perfect height for Mom to work at, 
with the bar stool being a perfect resting spot for her - or a potted plant.

 when it came to finding storage containers and accessories, 
i just went with the theme and found things that tie into the 'bar' idea...
assorted galvanized buckets and pails hold potting soil, gravel, and flower vases.
wood wine crates provide more storage for unused pots and hand tools.

inside the bar, items are stored mostly on the right side - 
so that on the left, dirt falls straight through the wire shelves to the ground for easy cleanup.
 behind the bar, a small trellis adds visual interest and a place to hang accessories,
like a small lantern and buckets to hold seed packets.
a burlap wine bag with 3 separated compartments inside
is perfect for transporting a garden kneeling pad, a spade, and gloves anywhere in the garden.

 on top of the bar, items used for beverage service are pressed into action for garden chores:
a silver ice bucket holds watering containers,
including a martini shaker for mixing up crystalized Miracle Gro fertilizer,
an old soda bottle with a vintage sprinkler spout for watering tiny garden specimens,
and empty wine bottles...

the wine bottles are a simple way to water your plants slowly - 
just fill bottle with water, invert into the soil, and gravity will do the rest as the plant soil dries out.
not to be forgotten, stemless wine glasses serve double-duty as mini-cloches over small potted plants.
if you buy the plastic versions of these, they'll fare well outdoors all year long!
[ I shared the glass-as-cloche idea HERE last spring ]

.. and last but not least, used wine corks make excellent pot-fillers - so save them!
[ find instructions for making my Seed Packet Tin Can Vases HERE ]

Mom watched me do all of this with great interest for half an hour.
when I was done arranging everything, 
she asked if I was going to create a 'signature cocktail' for the Garden Bar.

actually, I hadn't thought of that... 

seems like it needs to be made with Godiva liqueur and crushed Oreos so it looks like dirt,
or perhaps something citrus-y with basil from the garden. 
i guess I'll have to spend some time at the Garden Bar to figure it out!

shared online:

One Project Closer | Creativity Unleashed Link Party #9


12.18.2013

A Christmas Mystery!

Two weeks ago, I went out to get the mail - and discovered a surprise on the front step:
 
It was a large ziplock bag, filled with what at first glance appeared to be Fourth of July Sparklers.
with a thrift store price tag on the bag.

On closer inspection, I realized that they were not sparklers after all - 
but vintage Christmas decor parts!
They are old metal branches, 
covered in a heavy coat of thick black and silver German glass glitter!

I'm pretty sure that I have seen these in antique stores, assembled into trees
by inserting each branch into an upright metal 'trunk' with holes in it.
But of course I can't find an image of that online to show you :/

In ANY case, as soon as I realized what they were, 
I set to work adding them to my Christmas decor here at HOMEWARDfound Headquarters!
I simply stuck them into the diminutive white tabletop tree that I have
their bold, dark forms stand out against the white perfectly,
and the extra length of each branch allowed me to hang more ornaments on my little tree:

These ornaments are truly vintage, collected over the years.
I adore their tarnished silver/gold hues...
Mixed with modern crystal snowflakes, circa 1970 thread-wrapped balls, 1950's glittered balls,
a half-dozen wire stars from the late 1800's, and some of my hoard of pure white candycanes,
the old ornaments add depth and interest to a tree created in a limited and pale neutral palette.

Every single ornament stands out - just the way I like it!
The tree topper is a combination of elements
 centered around a tall glass figural spire from the 1960's that I've had for years.
It has a very long 'stem', and I don't like how it looks on a tree.
So I always 'hide' the stem with other things, grouped together.
Here, I used one of my original wire 'Junk Princess' crowns,
some old seam binding ribbon, and a few large crystal snowflakes...
it sparkles and shines and glimmers in the light.

About those vintage tree branches:

I've checked with my parents, and with several neighbors.
No one admits to leaving the bag on the front steps.
I have NO IDEA where it came from...
it's a Christmas Mystery!

11.05.2013

$5 Fall Wreath Makeover

You know I love 'making do' with what's already on hand... 
here's another 'Fast, Cheap & Easy' TM project that does exactly that!
Follow along and I'll show you how to take an old wreath from flab to FAB
[and remember, these tips would work for ANY season]
 my mom had this fall wreath stored in the garage. she's used it for years, and it's okay.
she bought it on clearance at Target
[yeah, the nut doesn't fall far from the frugal tree around here!!!]
but i knew i could make it better, and look exactly like the ones we saw over at a swanky store. 
she was eyeballing those wreaths over there and i could tell that she wanted one...

so i simply MADE one for her instead, by making over the wreath she already had.

continue reading to see how EASY it is to freshen up an old wreath!

10.21.2013

Charming Little Scarecrows

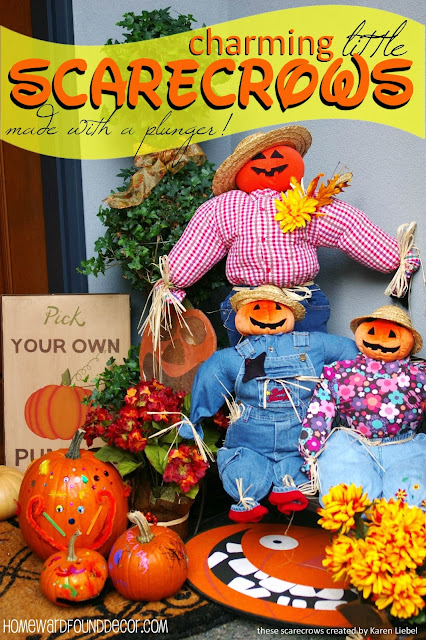
 A VERY unusual element makes these charming little scarecrows 
a 'Fast, Cheap & Easy' project... and you won't believe what it is!

Years ago, my friend Karen made the scarecrows in the image above
for the porch decor at one of our client's Seattle area homes.
A few years later, I made a similar little scarecrow, 
and came up with my 'crazy but ingenious' plan for his support system...
a standard rubber bathroom plunger.
yeah, really!

I DO suggest that you get a NEW plunger from a home supply store for this!
['reduce reuse recycle' has its limits, you know?!]

This illustration shows the process - 
Look at it from the BOTTOM UP !
Basically, you are building the scarecrow OVER the handle/post of the plunger,
which is stuck to the floor of your entryway, porch, etc.
Generally when I hear a description like that, I nod my head and go 'oh, I GET it!'
but I know not everyone is like that...
so here are some basic 'how to' steps to follow if you need them:

#1: First you stick the plunger to the floor - in your entryway, on your porch, wherever.
It won't stick to concrete, though, unless the concrete is really smooth.
If you have an extra doormat, flip it over and expose the rubbery side - the plunger will stick to that!

This method will make small scarecrows...
but you can stick the plunger onto taller items to make the scarecrows appear taller:
a five-gallon paint bucket wrapped in burlap, a metal milk can, anything that the plunger will stick to!

#2: Take a pair of child's pants - jeans, cords, overalls - and do one of two things:

If you want the scarecrow to sit down, put a hole in the crotch
so that the plunger's handle will go through the pants.

If you want the scarecrow to stand up, just slip one leg of the pants over the plunger handle.
[You'll need to 'scrunch' the pants down a bit once stuffed,
 to allow the shirt & head to fit on the handle, too.]

Close the ends of the pantlegs with a rubber band, and cover with raffia.
Then stuff the pants - I use plastic grocery bags or trash bags.
Stuff them REALLY full, making the pants as firm as possible  - not squishy.

#3. Place a wire clothes hanger inside a long-sleeved child's tee shirt or sweater
then place the shirt over the top of the plunger handle,
with the handle coming up through the neck of the shirt.

Close the ends of the sleeves with rubber bands, and cover with raffia.
Tuck the bottom of the shirt into the pants - use straight or safety pins to hold them together.
Add a raffia 'belt' in the pant belt loops if you'd like.
Then stuff the shirt with more plastic grocery or trash bags - 
again, stuffing it VERY full so that it is firm and not squishy.

Bend the top loop of the hanger in the shirt up straight, 
and DUCT TAPE it onto the plunger handle - this will help to hold the shirt and pants upright.
Leave about 4 inches of the handle at the top for the pumpkin head to fit onto.

#4. Get a lightweight 'FUNKIN' pumpkin, a plastic pumpkin pail, 
a plush pumpkin, or even a Sweater Pumpkin!
Put a hole in the center of the bottom of it. 
Then slide the pumpkin onto the plunger handle and snug it down to the neck of the shirt.

*** The pumpkin has to be lightweight - if it's heavy, it will cause the stick to lean over ***
You can add stuffed socks or shoes to the ends of the pant legs,
a stuffed pair of mittens to the ends of the shirt sleeves, 
and a hat to the top of the pumpkin if you wish.

You could also use children's Halloween costumes for this project!
Try some from the thrift store, or maybe even use the costumes that your kids have worn in past years!
[If , like me, you kept them because they were just too darned cute to part with. 
Yeah, I was that mom ;) My daughters have 'the Costume Box' now]

Just think how darling your front porch would be 
with a gathering of little costumed 'Trick or Treater' Scarecrows!


9.17.2013

Guest Designer: Amy Thayer

Today I am thrilled to introduce you all to my friend Amy Thayer!
Amy is a very talented stylist and photographer... and writer.. and cook... and mom...
[I think she has a WonderWoman cape in her wardrobe, I really do...]
We met through our work for FOLK Magazine last year,
and she really is as sweet and darling as she looks.

Amy is guest posting today on HOMEWARDfound
to share some of her fall decorating tips with you -  and I know you will LOVE them!

So, please welcome AMY!
It's no secret that Fall is my favorite time of year. I've said many of times that myself and extreme weather are not the best of friends. I tend to "hibernate" during those times. However, when the air begins to crisp and the leaves begin to Fall, I come out of hiding and go on a decorating frenzy. I often get asked, "Where do you get your inspiration to create your Fall vignettes?" Well, I get inspired in lots of places, but I have found that my vignettes really are created by a few simple steps and inspiration is only a very small part. I want to share with you a few of my steps and you, too, can create a stunning Fall vignette or a vignette for any season!

Before I start, I want to say that decorating is an art. You have to work towards it. If you don't love something, keep trying! You will eventually find your groove and style. We don't always get it on the first try either.

  • Step 1: Gather supplies- Use what you have.
You don't need an arsenal of Fall decor cramping your organized life. Walk around your house and pull things that have texture (wood, metal, chippy paint,) empty vessels (jars, baskets, trays, etc,) color appropriate things (pink and green, orange and aqua, black and silver, brown and gold- Don't be afraid to step away from the typical black and orange combo!) Be sure to grab some interesting things for height- you don't want every thing on one level. Use what you have!
Look at items for what they can become, not for what they are.
  •  Step 2: Create a background or backdrop 
This could be a fence, old door, corn fodder, hey bales, brick wall....anything. Your vignette needs it's "canvas" or a place for the eye to stop and focus on your vignette.
fence as backdrop
fence as backdrop
  • Step 3: This is where you start filling in your gathered supplies or your props. 
Create a balanced placement of your props by using my yin-yang method. Now, I call it "mine," but really it's just a simple method of creating balance. The reason we like a vignette or setting is because it's easy for us to look at. If it makes our eyes work because it is cluttered or unbalanced we don't want to look at it- it's too much work for our eyes. (stubborn, lazy little things. Aren't they!)
MommaHen's yin-yang method
It's kind of ironic that my above presentation is not exactly yin-yang, but let me break it down for you and describe what you are looking at. Yin-yang is, very simply put, forces working together to create one equal balance. You can achieve this by using triangles and odd numbers. I don't really know the science behind why we appeal to odd numbers, but it's true. 
When in doubt, always use groupings of three or odd numbers.
If you go through the image above you will see that as a whole there are a ton of aspects. The reason it works is because of all the small grouping using my yin-yang method. Notice each of the triangle groupings, meaning they are grouped in the shape of a triangle. Also, notice that the groupings are in groups of odd numbers. 
Try it! Walk around your house. Do you have an even number of groupings in a vignette? Break it down to three or another odd number. Place them in a triangular setting. What do you think? I told you it works!
  • Step 4: Bring in your natural Fall items.
Meaning leaves, pumpkins, gourds, corn, corn husks, anything that is naturally occurring in nature during this season.  This step gives your entire vignette a meaning. It will define your purpose of the vignette.
Fill your vessels, baskets, jars, etc. that you have collected and arranged from previous steps.


  • Step 5: add "creepies"
This is sort of an optional step, but crucial to be authentically MommaHen style. I always stop by my local Dollar Tree and stock up on black crows, spiders, spider webs, and little rubber rats. 
Don't go overboard! Just add a few randomly placed (small bits!) of web and a spider. Crows tend to hang together so have them lurking in or on a pumpkin. This just adds a fun and unexpected aspect.


Now, stand back and look at what you have created. What do you think? 
If there is something that you don't like, move it. Continue to not love it? Remove it! 
Just play with around with your new vignette until it's something you are proud of. Enjoy!

 I want to say a big giant thank you to Deb for having me over to HOMEWARDfound for a visit...
I greatly appreciate it and am so honored. I hope you all enjoy my style, and jump in and get creative!  
I invite you to stop over and visit me on my blog, anytime.
Amy Thayer of mommahenscoop.com


9.05.2013

A Fabulous Fall Fete!


OK, just so we start off on the right foot here, that word is not 'FEET'! It's more like 'FATE':


fête [ fāt , fet/ ] (faet / fate)
noun
noun: fête; plural noun: fêtes; noun: fete; plural noun: fetes
  1. 1.
    a celebration or festival.
verb
verb: fête;
1.
honor or entertain (someone) lavishly.
"she was an instant celebrity, fêted by the media"


Let's go with BOTH definitions, for they certainly fit this story!

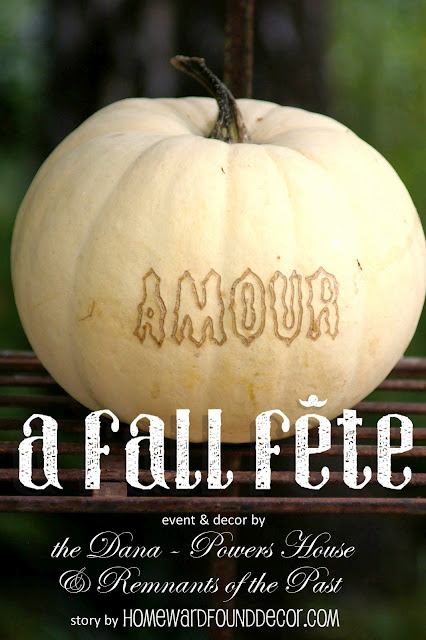
Today, I'd like to share with you some welcoming, elegant fall event decor.
I took the photos in this post back in October, 2010, at the Remnants of the Past Antique Show - 
which was held at the historic Dana-Powers House in Nipomo, CA at that time.
[it's now held at the glorious Madonna Inn in San Luis Obispo]

Judi Powers (left) owns her family's historic property, and Judy Watkins (right) owns the show.
 Together, they created beautiful decor to welcome the show vendors for a party.
The gathering was held on the beautifully landscaped grounds of the farm on the night before the show.
And 'the Judys' always make things SPECIAL!
They have great style, and I know you'll love seeing what they did...
The setting was the beautiful gardens surrounding the historic house...
 a private and perfect site for weddings and parties all year long!


continue reading for more inspiration...