. -->

hello! don't miss all of my sidebar content - click 'view web version' on your screen!

Showing posts with label transitional. Show all posts

1.11.2013

Warm Winter Decor

 today i am simply sharing these images of one my past homes
[known as 'the Cottage']
showing some easy ways to warm up your winter rooms using color and texture

the decor in these images show how the room was decorated
immediately following the holiday decor scheme seen in this post

 you'll see some of those holiday elements re-used in a new way
 to lighten up the rooms and make them warm and inviting, 
while remaining spacious and uncluttered.
it's a great way to start off the year!
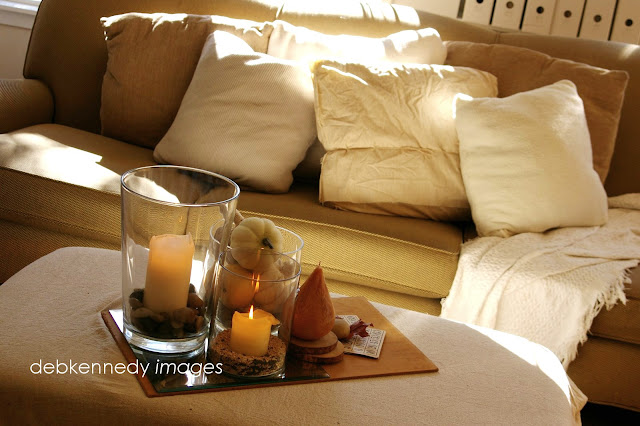
simple elements and color add comfort and warmth
that wrap around you like a cashmere sweater
the mantel's arrangement of branches brings nature into the composition
and a collection of quirky letter K's adds interest without clutter
i collect letters from everywhere, and i also make them myself:

*a K cookie cutter, painted black
*a clear glass cylinder vase with a cursive k painted on with a paint pen

*a carpenter's ruler forms a K
*a cursive k cut from a piece of vintage sheet music
*a chipboard K covered with white glitter

a quick-change of the lampshades on the chandelier and the addition of clear crystals to bounce light
branches, pine cones, and bird nests bring the feeling of the winter woods indoors

if you aren't into neutrals
[and that's perfectly fine!]
it would be easy to replace the dark brown and tan colors in this room 
with bright or pastel hues - and you'd have a completely different look!

8.22.2012

front porch fall decor: raid the garden shed!

 when it's time to spruce up your front porch decor for fall,
look no further than your garden shed or garage.
the stuff you have on hand out there will make seasonal decorating EASY!

look at that top photo. what do you see?
galvanized buckets. a watering can. a plant stand, maybe.
those are PROPS, people! and with PROPS, you can get BIG effects FAST.
here's the 'Fast, Cheap & Easy' scoop
  on how this vignette came together:

i grabbed an old black iron plant stand and literally slopped some white paint on it.
[go to ReStore or other thrift shops for paint for projects like this.
it doesn't have to match anything else, it just needs to be some kind of white or gray
or whatever color you want it to be. quarts for a buck, gallons for three - 
paint isn't cheaper anywhere. and you're keeping it out of landfills, too!]

one galvanized bucket sits in the plant stand, lined with with an old burlap bag.
one bucket went on the ground, upside down to serve as a pedestal.
[maybe you have harvest baskets, or wire locker baskets to use]

the rusty white metal watering can is balanced on the back edge of the lower bucket.
it leans against the wall. and it has no bottom.who cares?!

some of my large 'slopped-on-white-paint'-ed  pumpkins
(one terra cotta, one resin) are the focal points in both galvanized buckets. 
a few cream-colored resin pumpkins sit on the ground, just for good measure.
[Dollar Tree stores have small sizes of resin pumpkins - for a buck.
look for bigger ones at thrift stores. and yes, you can paint them!]

and here's the best part: that COOL grass you see in the bucket?
dead daylily leaves. yep. 
after summer was over last year, the foliage died.
i cut it off the plants and put it on a shelf to save it.
(that may stretch into the realm of hoarding, i'm not sure...)
but it was FREE 
and the dark color contrasts so well with the gray siding and the white pumpkins!
so, handfuls of the foliage went into the top bucket and the watering can.
[what about using plain old grasses/WEEDS, 
the ones growing on the roadside?]

some small bunches of real bleached oak leaves tuck in to finish it all off.
[get these at a craft store, like Michaels or JoAnns or Ben Franklin]
you can also get fabric leaves at the Dollar Tree store 
and soak them in a bleach & water solution until they are colorless.
keep them away from kids while doing this!
[or head to a vacant lot, your yard, or a friend's yard to gather leaves from trees. 
just don't raid your neighbor's yard without asking!]
the 'fall' tag was made using a white index card and some scrapbooking stickers 
[from the Dollar Tree store]
it hangs from the watering can handle with a metal shower curtain hook.
[if weather would have affected it, i could have covered it with clear packing tape]

that's all it takes to style your front porch for fall!

so tell me....
what's in your garden shed, waiting for the spotlight?!
 
this photo was shot THROUGH the screen door... 
i love how the screen texture ages the look of the image.

might be a good idea to print that photo and hang it inside,  
so i can enjoy my porch decor as much as my neighbors!

psssst: see what i did for my holiday season front porch decor


shared online:

 Debra's Common Ground | Fabulous Fall Fun

Cupcakes & Crinoline | Project Inspire{d}

8.10.2012

Gettin' Scrappy

in a previous post, I shared some simple ways to change the look of a room for fall.
here are a few more photos and ideas from that 'tattered & torn' room...

sofas are just more comfy filled with pillows, don't you think?
i love pillows that add texture and interest to a room,
so i usually make my own covers from scraps of miscellaneous fabrics i have on hand.
the ones shown here are made from .... oh, come on, you know this... old sweaters. o yeah. i did.
i had some really soft, comfy old sweaters in creamy colors that i loved -
but they had stretched out a bit and i couldn't wear them anymore.
[i had streched out a bit, too, but let's not go there....]

i thought that i could still enjoy the softness of the sweaters if they were covering pillows, so...

The How-To:
*cut the arms off of the sweaters and flip the sweater body inside-out 
*sew a line up both sides and across the neck hole
*turn the cover right-side out, and pop a throw pillow form inside
[you can get cheap pillows at Ross, Marshalls, or the thrift store.]
*hand-stitch the bottom edge closed

*when you want to wash them, cut the threads and the pillow comes out -
and because it is the bottom hem of the original sweater, it doesn't unravel in the wash.
*put the pillow form back into the cover, and re-stitch it closed.

i didn't make these as 'envelope'-style covers because sweaters SAG,
and when i am cuddled up on the sofa on a rainy fall day,
i don't want the sweater cover sagging and falling off the pillow under my head.

another of the pillows is covered in a muslin fabric, and i DID sew that one with an envelope closure.
[i had some remant scraps in a box, but you could just as easily buy the fabric -
muslin is about $3 a yard.] then i tied a thick piece of string around it for interest.
another thing you can do with fabric scraps is change the look of your lampshades!
it's simple, really - wrap a bit of fabric around the shade, and pin it to help it keep its shape.
no glue, no fuss, no muss.
the two lamps shown above have two types of fabric on each shade,
just layered over one another and then pinned together.
[the fabric is pinned in smaller at the top, so it doesn't fall off the shade]
a simple string tied around adds interest and keeps the fabric in place, as well.
you could also use removable tape to secure the fabric.

mine is loose and unstructured - yours might be cut to size and crisp.
or maybe you will use strips and tie them vertically around a wire lampshade frame...
[i actually have another post planned to share ideas like that!]
just match your own style!

and i have to say, the ivory fabric over the white shades made the light in these rooms GOLDEN.
[i looked ten years younger in those rooms! man, i miss those lamps.....]