. -->
Showing posts sorted by relevance for query halloween. Sort by date Show all posts

10.24.2013

8 'Black Magic' Halloween Ideas!

 As Halloween Eve creeps ever closer, don't forget about the simple SCARY touches you can add
to everyday items in your home!

The black chandelier above has a center that resembles a cage -
so I treated it like one, and filled it with some drippy spanish moss and one solitary black crow.
I wrapped the faux candles in black glossy paper,
and used clear low-wattage nightlight bulbs for a sinister glow.

Click here for another idea for embellishing your chandeliers!
These two photos show an elegant carved wood white mirror that has been spookified:
A length of black sheer fabric is tucked between the wall and the mirror,
with one end of the fabric hanging down below it and one end tucked into a 'hood' shape at the top....
shrouding the mirror in mystery...

 more ideas for spooky black decor:

Bewitched Mirror Trick


Glass Globe Crystal Ball

Mad Science

Big Black Spiders

9.01.2012

Tutorial: Clay Mini Pumpkins

 September is here, and it's time for a craft project!

I've linked this one up with Donna's FunkyJunk Interiors

Years ago, when my four children were small, I came across a recipe for homemade clay.
We used it to make little pumpkins for Halloween decor. 
The pumpkins shown here are the last remaining few from that project over 20 years ago.
Yes, they have lasted that long! 

The scene above shows the clay pumpkins gathered around a porcelain figure of a girl -
she's a 'shelf-sitter' that I used in my seasonal decorating over the years.
I made her party hat out of scrapbook papers and crepe paper, 
and included a 'Winnie the Pooh in the Hundred Acre Wood' cookie jar in the party.
The characters on it are wearing costumes, so it was a perfect fit for Halloween. 

Making these little pumpkins from clay was a fun project for the kids... and me ;0) 
While I displayed them in their original orange craft-paint finish for years
the paint began to wear off after two decades, and I decided that it was finally time
to make them match the rest of my pale color scheme.
I repainted them in a creamy ivory color, and displayed them with more elegant surroundings:
Whether you use colored clay or paint the finished pumpkins, 
this clay craft is something the whole family can enjoy -
and it's made using ingredients from your pantry!

The recipe and instructions are below, so you can make your own.
Happy Fall!!!

CORNSTARCH CLAY Mini PUMPKINS

1 c. cornstarch
1 1/2 c. baking soda
1 c. cold water
Food coloring if you wish to use colored clay

Saucepan
Toothpicks
Cookie Sheet

Combine ingredients in saucepan.
Stir gently while cooking on medium heat stovetop until liquid solidifies and clay forms. 
Remove from heat. Turn off burner.
Remove clay from saucepan and place on cutting board to let cool.

Knead clay for a few minutes to create smooth texture. If the clay cracks as you knead it, add a few drops of water and keep kneading.
Form balls of various sizes. [For best drying results, do not make balls larger than 2" diameter.]
Press down on top of ball lightly to form a more pumpkin-like shape.
Use toothpick to score lines like pumpkin grooves. 
Make indentation on top of pumpkin for stem to sit in.

Form small cylinder,  and squish both ends to look like a stem.
Place stem into indentation on top of pumpkin, and use toothpick to press edges together. 
[you can break a toothpick and insert it into the middle of the stem, then into the pumpkin to help anchor it, if you wish]

**my friend David at BasilicusJones Home used real twigs, broken into small lengths, for his stems. Cute idea!**
Add details into pumpkins to make faces, if you wish, using toothpicks, nut picks, dental tools, etc.

Place on cookie sheet and Bake for 1 hour at 250 degrees, or harden at room temperature overnight. 
Paint if you wish, then seal with clear acrylic spray paint.
When not being used, store in a ziploc plastic bag to prevent moisture from  reaching pumpkins.


I hope you enjoy this easy fall craft! Want MORE great pumpkin ideas from Deb?

Check out my Original Glass Lamp Globe Pumpkins
and my Original Sweet Sweater Pumpkin Tutorial


shared online:


Funky Junk Interiors Party Junk | DIY Pumpkin Projects

10.25.2015

It's Not Too Late to Get Your SPOOK On!

Looking for last minute Halloween decor ideas?
(it's okay!)
Have no fear! I have a TREAT for you in my archives:
a bunch of my trademark 'Fast, Cheap & Easy' TM ideas...

just click on the 'read more' link!

9.18.2013

Madre de Dio de Los Muertos!

Having spent more than 35 years as a retail display designer and stylist,
I have a great appreciation for this art of merchandising products - when it is done right.

And let me tell you, I live five miles from one of the BEST visual merchandising teams in the WORLD!
The geniuses at Roger's Gardens came up with this AWESOME idea,
and so for my first HALLOWEEN post, I just had to share it:
Paint Dia de Los Muertos [ 'Day of the Dead'] elements onto classical statuary.
MIND. BLOWN.
[I'm not sure, but those two on the bottom could be
Janet and Rocky from the Rocky Horror Picture Show.... smile]

These statues punctuate one of the SIX rooms in the 2013 Halloween House - 
a warren of six rooms on the grounds of the nursery that is transformed each fall
into a wonderland of scary delights.
This year, the theme is 'Night Gallery', and everything reflects a haunted museum/art gallery.
Ghoulishly clever!

Yes, you COULD do this!
Every time I walk into a thrift store, there's some errant knick-knack on a shelf
that looks like Marie Antoinette or Caesar or George Washington...
[usually they are concealing an AVON bath oil bottle, but whatever! They'll work!]
Paint them with flat white paint and then get busy adding dio de los muertes (Day of the Dead) motifs using paint pens, felt markers, poster paint, craft paint
....and those stale old 'busts' will be history. or... 'busted'. 
Take your pick! And have fun!

I have more photos of other brilliant ideas that they came up with, 
which translate into things for you to try at home... 
and I'll try to break them down into easy steps to get a similar look
without having a lifetime of experience in visual effects... stay tuned!

Photo credit: Debi Ward Kennedy . Photos of Rogers' Gardens displays

8.19.2013

'as seen in BHG!'

 A few weeks ago, I received a very nice message from LuLu Tapp,
owner and photographer extraordinaire from DustyLu Interiors & Photography in Los Angeles.
She let me know that my little pumpkins were going to appear
in the feature on her lovely home
in the Better Homes & Gardens Halloween Tricks & Treats 2013!

After I picked myself up off the floor, I thanked her. Profusely!
And I've been on the lookout for the issue ever since.

Monday, she messaged me "Hey Deb!!! Its out its out!!! On newsstands now!!!Woot woot!"
At nearly the same time, a friend sent me the cover shot shown above,
then another friend sent me an interior image that includes my 2012 Harvest pumpkins:
This is one of Lulu's photos of her gorgeous home from the magazine... LOVE!

Being able to use the words 'As Seen in BHG' is just a dream come true -
I am so very thankful for the opportunity.
I originated this design, and have been making and selling them for many years,
and it's nice to finally be 'noticed' this way.

I saw a comment that Lulu made on Instagram and it made me do backflips:
"Better Homes and Gardens editor was flipping over the pumpkins and botanicals  -
I think she wanted to take them!!! Lolol"

Lulu discovered my original Sweet Sweater Pumpkins last fall, at Kymberley Fraser's store 'A Beautiful Mess'.
They looked like this in her display:

Thank you again, Kymberley, for your support!

9.06.2012

a stylist's Top 5 Tips for seasonal displays!

some of the best tips & tricks i've learned and developed as a retail display stylist
[i've been at it for over 36 years, including designing booths at vintage shows like the one above]
work very successfully when applied to decorating homes... so i thought i'd share
the TOP FIVE techniques, tips, & tricks used in retail display
to help you get great visual impact with your seasonal decor!
1. start with a theme. 
my fall theme always begins with pumpkins, because I have a lot of them.
i've got glass, ceramic, wood, fabric, plastic, styrofoam, paper, dough, clay, terra cotta, real gourds,
and of course sweater pumpkins.
they spend far too many months packed in foam and cardboard, just waiting for their day in the spotlight,
so i give it to them for three months a year.
some people like swanky black & white accents with bling,
some like cute witches in orange and green and  yellow and black.

with a theme, I can coordinate all of the display areas in all of my rooms easily: 
every focal area has to have some pumpkins. 
i'm also big on natural elements: bleached leaves, faded roses, foliage & florals in pumpkin colors. 
add a few 'hard surface' elements: glass, silver, and wood containers.
So all of those elements together serve to define and express my theme.
2. find your focal points.
walk through your home, from the entry, and pay attention to where your eyes travel.
mine are the front porch, front entry, library table, mantel, buffet, dining table, and kitchen window. 
from small to large, each of these will hold the same theme, colors, and elements 
which will spread the season's 'story' all thru my house. 

by concentrating your efforts in the main focal areas, 
you'll get better visual impact AND save yourself time and money.
your seasonal decor needn't be on every single table, shelf, area - sometimes, less is more. 
(i can't believe i said that!)

the mantel is one of the main focal points as you enter this home.
 i didn't want to do a central arrangement or both sides, 
as these colors are so vibrant it would have been overwhelming. 
so i placed a clock on one side of the mantel,
 and a big colorful arrangement of flowers and pumpkins on the other side.

i practiced restraint  - something extremely hard to do!
in retail visual merchandising we normally do everything very BIG and very theatrical. 
 in a home, you have to dial it back a bit - especially in small rooms.
3. use color to pull your eye thru the space.
the photo above shows a display in the area just outside the front door.
from the first step up onto my covered front porch all the way thru the house, it's the same story. 
the pumpkin theme and the colors of orange, rust, and vanilla
catch your eye and cause you to look EXACTLY where i want you to look in the house!

i do that for two reasons: 
one, it's how i work. i'm obsessive that way. 
in retail, this practice is called 'color spotting' and it always works.
and two, this house is small. i mean, really small. it is a 1924 cottage, not even 1000 square feet. 
so to have too much visually going on [and definitely having too many different things going on] 
would cause me to lose my marbles staring at it all the time!
keeping the seasonal decor coordinated and simple, and placed strategically,
lets the color in the decor lead the eye of the beholder through the small space.
4. plan flexible, organic displays.
on my big long pine dining table, i grouped more of the same elements casually. 
i wanted the whole scheme to look sort of 'unstudied', just left there as if i had discovered it on a walk. 

i do add more stuff to my displays all thru the season. 
keep your displays organic (open to natural change). move things, add things, rearrange things. 
keep it interesting, not static.

one BIG change i make with my fall displays is this:
i begin in September with my pumpkins 'faceless'. 
that means if a pumpkin has a jack o' lantern face, it's turned toward the wall or back of the display. 
in October, i turn the pumpkins around so that the faces show for Halloween.
and then in November, i turn them back around again.
5. hang usable objects as art.
in a store, this is the equivalent of a moving hanging rack.
here, you see that door with old hooks i shared in a past post -
now it has a hanging straw purse filled with rust-colored silk roses and straw hats.
it's a neat 3-D artwork piece - i could have hung a painting here, but this is more tactile and fun.
find a coatrack or pegrack, something that you can alter, add to , and change with small touches.
functional items like scarves and gloves, umbrellas, even canvas bags of books
can look artful when arranged on purpose.

*** Hello to everyone visiting from the Funky Junk Interiors 'Love That Junk' Linkup!***
Thanks for the feature, Donna!

I've just added a brand new post with MORE ideas for re-purposing OLD DOORS!
click here to see what I've done with them over the years...


bonus tip:

6. use light to set a mood.
in the dining room table photo, and the foreground of the photo above,
you can see more glass vases with candles and fall leaves.
in the photo of the mantel, you can see a small lamp. 
warm light from candles and small lamps, a fireplace, or an illuminated painting on the wall
will add sparkle and glow to your rooms like no ceiling fixture or lamp on an end table can.
similarly, open window treatments will let in the golden autumn light
in the mornings and afternoons, 
creating changing patterns across the room and bringing it to life.

and with that...
a scented candle and beautiful music will be the finishing touches for beautiful rooms
that will welcome you, your family, and your friends in this autumn...
have fun creating seasonal touches in your home!

featured online:
Funky Junk Interiors | Love That Junk Link Party

11.22.2022

a 'gingerbread holiday' dollhouse

painting,holiday,Christmas,Christmas Decor,re-purposed,up-cycling,makeover,DIY,diy decorating,thrifted,art class,gingerbread theme,gingerbread decor,gingerbread Christmas,gingerbread home decor,Christmas home decor,gingerbread holiday decor,gingerbread crafts,gingerbread dollhouse,dollhouse makeover.
because i squeezed in my last Thanksgiving post on Friday of last week,
it's finally time to share holiday decor!

 this first project was inspired by some halloween decor that i saw online
and you probably saw it, too...
dollhouses painted as decrepit old haunted houses.

i saw so many amazingly creative 'takes' on that idea on social media,
and decided then to create a gingerbread dollhouse for Christmas.
and that idea launched an entire theme:

welcome to my 'Gingerbread Holiday'!

once again, i'm making use of elements i have on hand already
along with a few CHEAP additions from thrift & discount stores
to create a whole new holiday decor theme to enjoy.

continue reading to see the before shot and all the details...

1.20.2020

happy Galentine's day!

Valentine's Day isn't ALL about hearts and roses and romantic love.
it's also a great time to share the love with your girl friends - especially the single ones ;) 
(and who needs roses when you have rose', amiright?!)

the idea for our party decor started with a pink paint chip from the hardware store.
i had a few on hand after helping a client select paint colors for her retail shop,
and with them, this party theme rapidly became 'Paint the Town Pink!'

continue reading to see some fun ideas for a themed GALentine's dessert party...

9.06.2022

NEW! faux 'sand' painted pumpkins

coastal grandmother,fall,pumpkins,painting,faux finish,tutorial,home decor,decorating,diy decorating,DIY,re-purposing,beach style,coastal style,boho style,pumpkin decor,painted pumpkins,no carve pumpkin decor,coastal fall home decor,beachy fall home decor,autumn decor,fall decor,paint tips.
let's just jump right in to pumpkin season, shall we?
during my summer break, i let my creativity + imagination run wild,
which resulted in a bunch of fun new pumpkin decor projects for 2022.

first up, a new idea that is the perfect transition from summer to fall:
faux 'sand' painted pumpkins

if you're a beach lover like me, or a tropical / tiki culture lover like me,
or perhaps a 'coastal grandmother' like me??! ha!
this idea may be the perfect way to bring some beach vibes home...

continue reading for my easy paint tutorial!

8.03.2012

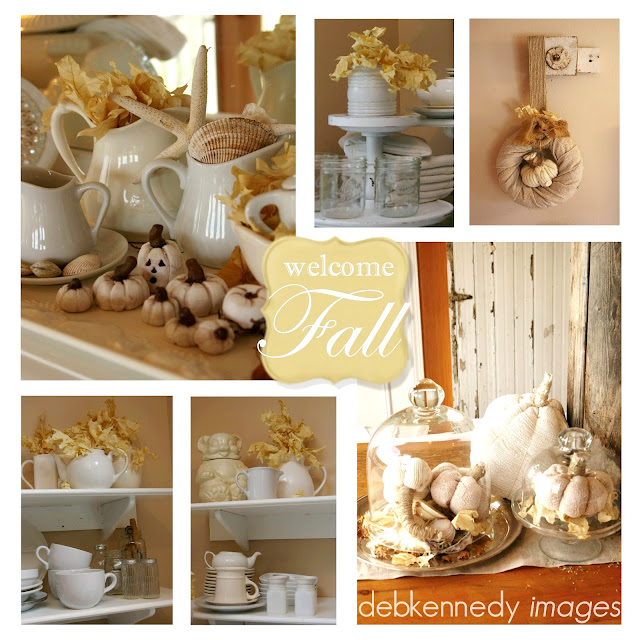
welcome fall!

FALL is just around the corner!
it's already august, and while we are all enjoying lazy summer days poolside, 
 the stores are putting up Halloween displays and Pinterest is rampant with inspiration for fall decorating! 
(check out my 'september decor: fall harvest' Pinterest board here)

so get ready for a lineup of inspiring FALL content that will help you create some AMAZING fall decor...
no matter what your style is, you'll find ideas to make your OWN!

9.12.2012

Fast, Cheap & Easy: Funkin Pumpkins!

the subject of  'fall decorating with pumpkins' just isn't complete
without mentioning fabulous FunkinsTM
[and seriously, go HERE to their website to see some JAWDROPPING ideas]

Funkins are lightweight resin pumpkins available in craft stores
and, for the truly CHEAP among us, at thrift stores.
these are really cost-effective, because they are reusable every year.
the thing is, Funkins LOOK like real pumpkins - and so just like real pumpkins,
you can carve them, paint them, embellish them, light them up...

 however, because they are lightweight, 
you can do things with Funkins that you can't do with real pumpkins:
hang them up, suspend them, cut them in half and hang them on a wall, impale them, 
add them to floral arrangements and potted plant displays... and more.

they become all-purpose decor props for fall and Halloween!

In the photos above, you see two large sized Funkins sitting in gorgeous black urns
at the entry to a residence that a partner and I decorated for several years.
each one is impaled on a wooden dowel that's been inserted into the dirt in the urn.
this holds the pumpkin upright in windy conditions.
this is a 'Fast, Cheap & Easy' TM way to add fall style to an existing planter.

 on the front porch, another Funkin joins a spooky topiary and some painted wooden pumpkins
to create a welcoming vignette.

the monograms on the Funkins shown in these photos
were all done with a simple black regular-tip Sharpie Marker
to coordinate with the welcome mat design, and to fit the elegant style of this client's home perfectly.

have you ever used a Funkin in YOUR fall decorating?
leave a link to your photos in a comment below, and let us see what you've come up with!

10.21.2013

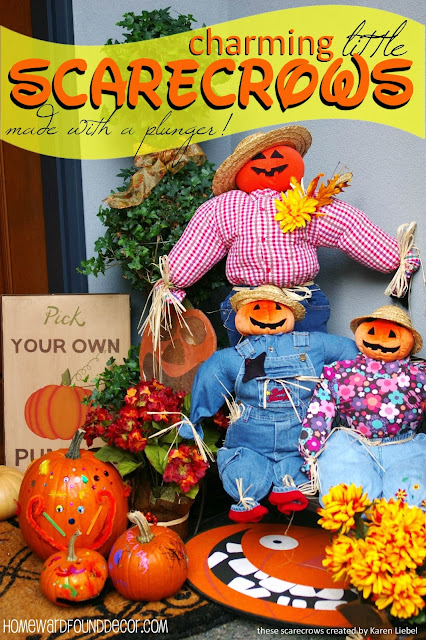
Charming Little Scarecrows

 A VERY unusual element makes these charming little scarecrows 
a 'Fast, Cheap & Easy' project... and you won't believe what it is!

Years ago, my friend Karen made the scarecrows in the image above
for the porch decor at one of our client's Seattle area homes.
A few years later, I made a similar little scarecrow, 
and came up with my 'crazy but ingenious' plan for his support system...
a standard rubber bathroom plunger.
yeah, really!

I DO suggest that you get a NEW plunger from a home supply store for this!
['reduce reuse recycle' has its limits, you know?!]

This illustration shows the process - 
Look at it from the BOTTOM UP !
Basically, you are building the scarecrow OVER the handle/post of the plunger,
which is stuck to the floor of your entryway, porch, etc.
Generally when I hear a description like that, I nod my head and go 'oh, I GET it!'
but I know not everyone is like that...
so here are some basic 'how to' steps to follow if you need them:

#1: First you stick the plunger to the floor - in your entryway, on your porch, wherever.
It won't stick to concrete, though, unless the concrete is really smooth.
If you have an extra doormat, flip it over and expose the rubbery side - the plunger will stick to that!

This method will make small scarecrows...
but you can stick the plunger onto taller items to make the scarecrows appear taller:
a five-gallon paint bucket wrapped in burlap, a metal milk can, anything that the plunger will stick to!

#2: Take a pair of child's pants - jeans, cords, overalls - and do one of two things:

If you want the scarecrow to sit down, put a hole in the crotch
so that the plunger's handle will go through the pants.

If you want the scarecrow to stand up, just slip one leg of the pants over the plunger handle.
[You'll need to 'scrunch' the pants down a bit once stuffed,
 to allow the shirt & head to fit on the handle, too.]

Close the ends of the pantlegs with a rubber band, and cover with raffia.
Then stuff the pants - I use plastic grocery bags or trash bags.
Stuff them REALLY full, making the pants as firm as possible  - not squishy.

#3. Place a wire clothes hanger inside a long-sleeved child's tee shirt or sweater
then place the shirt over the top of the plunger handle,
with the handle coming up through the neck of the shirt.

Close the ends of the sleeves with rubber bands, and cover with raffia.
Tuck the bottom of the shirt into the pants - use straight or safety pins to hold them together.
Add a raffia 'belt' in the pant belt loops if you'd like.
Then stuff the shirt with more plastic grocery or trash bags - 
again, stuffing it VERY full so that it is firm and not squishy.

Bend the top loop of the hanger in the shirt up straight, 
and DUCT TAPE it onto the plunger handle - this will help to hold the shirt and pants upright.
Leave about 4 inches of the handle at the top for the pumpkin head to fit onto.

#4. Get a lightweight 'FUNKIN' pumpkin, a plastic pumpkin pail, 
a plush pumpkin, or even a Sweater Pumpkin!
Put a hole in the center of the bottom of it. 
Then slide the pumpkin onto the plunger handle and snug it down to the neck of the shirt.

*** The pumpkin has to be lightweight - if it's heavy, it will cause the stick to lean over ***
You can add stuffed socks or shoes to the ends of the pant legs,
a stuffed pair of mittens to the ends of the shirt sleeves, 
and a hat to the top of the pumpkin if you wish.

You could also use children's Halloween costumes for this project!
Try some from the thrift store, or maybe even use the costumes that your kids have worn in past years!
[If , like me, you kept them because they were just too darned cute to part with. 
Yeah, I was that mom ;) My daughters have 'the Costume Box' now]

Just think how darling your front porch would be 
with a gathering of little costumed 'Trick or Treater' Scarecrows!


9.05.2023

a NEW LOOK for my Original Sweet Sweater Pumpkins!

pumpkins,Sweet Sweater Pumpkins,Sweet Sweater Originals,original designs,tutorial,fall,home decor,Better Homes & Gardens Magazine,Romantic Homes Magazine,published,sweaters,up-cycling,re-purposing,pumpkin home decor,diy pumpkins,diy fall decor.
september is here, and you know what THAT means...
it's time for sweater weather AND sweater pumpkins!!!

i've been making + selling my Original Sweet Sweater Pumpkins TM since 2007,
and while i haven't sold any since i had my little hwf shop in 2017,
i occasionally still make new versions!
in 2021 i made a batch of new yellow 'sweeties' for myself, 
and this year after creating a huge new multicolor batch for my daughter Bethany,
i've made a revision to the way i finish them...

continue reading for a quick addition to my original tutorial...

12.21.2016

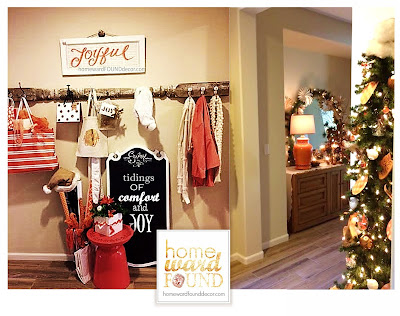
Orange You Glad You're Here?!

While much of our home decor this Christmas is in neutral tones
(ivory, cream, tan, rusty brown, bronze, copper, and gold),
we decided to leave the bright orange decor already in the entryway.
(click to see more about the Joyful sign)

This happy hue brightens that small, dark space right up!

The addition of a tall, skinny tree in the corner added some light,

and a chance to create a fun, lighthearted feeling...
yet very different than the fun tropical tree decor that we created at the old house!

Continue Reading to see what we did... 


10.31.2023

painted 'chocolate' pumpkins on a sweet sweater cake

fall,pumpkins,foofoo Faux Food,sweaters,home decor,DIY,diy decorating,seasonal,decorating,painting,tutorial,Thanksgiving,Halloween,re-purposed,thrifted,dollar store crafts,faux cake with faux chocolate pumpkins,Dollar Tree pumpkins.
a fitting conclusion to my recent faux food project posts,
this one really takes the cake....

this project came about because i had some tiny styro pumpkins,
which made me start thinking about making a very REAL cake
like my Mom used to make every fall when i was a kid.
it was always a round two-layer chocolate cake with chocolate icing
and adorned with tiny orange candy pumpkins all along the top edge.
i loved that cake.
we took them to school fall celebrations and church harvest festivals.
we took mini versions - cupcakes - to friend's houses.
we never brought any of it home, either!!! everyone loved it.

instead, i decided to make a fall 'cake' in my own style...
because deb does NOT need more calories!

continue reading for the before and after...

10.22.2014

Painted Paper Lanterns

I saw this idea at Roger's Gardens Hauntingly Beautiful Halloween BOOtique...

Take accordion-style tissue paper lanterns, fans, and other decorative accessories
( like the ones you can get CHEAP from Oriental Trading Company )
and paint the edges BEFORE you open them!

TIP: paint using a soft brush (not spray), then open immediately.
If you don't, the paint may stick the whole shebang together!


Paint black on the edges of white or cream, 
for a dramatic contrast.

Paint glittery silver or gold on the edges of black or white,
for elegant sparkle.

Tissue paper shapes can be really gorgeous decor...
I found a bunch of old tissue paper 'parasols' in a thrift store years ago,
and used them to fill in an empty overhead space at a show:

 Find More HOMEWARDfound Inspiration for Every Season of the Year: