. -->
Showing posts sorted by date for query Daffodils. Sort by relevance Show all posts

5.10.2023

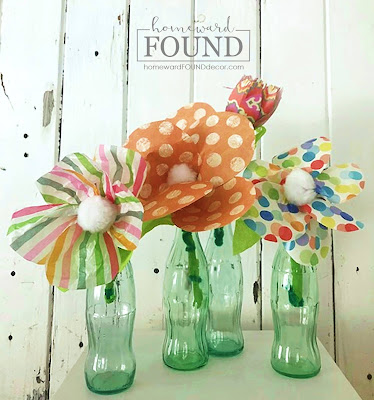
giant paper flowers

spring, Mother's Day, flowers, DIY, crafting, decorating, dollar store crafts, tutorial, garden style, diy decorating, paper crafts, paper, vintage paper, paper flowers, diy paper flowers.
sometimes it's just best to go BIG, you know?
i've been a retail visual merchandiser + display designer / stylist for over 45 years,
and have made a LOT of props in my lifetime...
and i learned that whether you're creating a window display
or an event display or a photo backdrop, large scale has the most impact.

making big things can get costly, tho - unless you use inexpensive materials
like paper, tissue, and repurposed/upcycled elements.

the flowers you see up above were created for use in an event entry display,
and are made from new cardstock paper -
but i've made similar ones from vintage book pages, too.
can't you just imagine flowers made out of repurposed MAPS?
old newspapers? magazine pages? gift wrapping paper?
yep, so can i!

i can also see them decorating a lovely Mother's Day brunch setting,
or as decor in a nursery or girls' room.

continue reading for a quick tutorial and loads of inspo...

4.12.2023

NEW! Sweet Sweater Potz!

spring, garden style, flowers, DIY, diy decorating, Sweet Sweater Originals, Sweet Sweater Potz, sweaters, crafting, decorating, re-purposing, up-cycling, trash to treasure, flower pots, plant pots, tutorial
spring has sprung! 
one of my favorite passages in the Bible speaks of spring the way i think of it:

"For now the winter is past; the rain is over and gone.
The flowers appear on the earth, the time of singing birds has come,
and the voice of the turtledove is heard in our land.
The fig tree forms its early fruit; the blossoming vines spread their fragrance."
Song of Solomon 2:11-13

watching nature come back to life after a long cold winter revives me.
especially in a weird weather year like this one
(endless rain. snowing at DISNEYLAND! tornado near Los Angeles!),
i am always happy when spring finally arrives...
and if it doesn't arrive soon enough for me, i just create my own kind of spring vibe!

my newest Sweet Sweater Original TM creation is a nod to springtime
that i'll be enjoying for the next few months...

continue reading to see how simply you can create my Sweet Sweater Potz!

5.30.2022

May flowers: art challenge recap

flowers,art,wreaths,art challenge,diy decorating,up-cycling,spring,trash to treasure,re-purposing,paper crafts,painting,DIY,crafting,Instagram,tutorial,art class,creativity,garden art,buttercup,daisy, daffodil, dandelion,frangipani,gerbera,hibiscus,marigold,poppy,rose,sunflower,tulip,yarrow,zinnia,spring flowers, summer flowers,fall flowers,holiday flowers
over the past month, i've been participating in a creative art challenge...
the #flowermonth2022 challenge on Instagram
was sponsored by three artists,
with thousands of creative people around the globe participating.
each interpreted the prompts - an alphabetical listing of flowers - 
in their own style and method.
it has proved to be not just a fun exercise for me,
but also an educational experience,
as i've seen many variations on the themes in many different art mediums.

my own creations for this challenge
were all made from materials & elements that i have here at home - 
all reused, repurposed, recycled, and turned into flowers & foliage:

scrap paper, paint, paint pens, colored pencils, felt pens, fabric, gift wrap, 
wood blocks, vintage crepe paper, tissue paper, wire, sweaters, yarn, 
vintage jewelry, sewing pins, even plastic parts from dollar store flowers.

flowers,art,wreaths,art challenge,diy decorating,up-cycling,spring,trash to treasure,re-purposing,paper crafts,painting,DIY,crafting,Instagram,tutorial,art class,creativity,garden art,buttercup,daisy, daffodil, dandelion,frangipani,gerbera,hibiscus,marigold,poppy,rose,sunflower,tulip,yarrow,zinnia,spring flowers, summer flowers,fall flowers,holiday flowers
though my original plan was to make 12 different flowers, as shown here,
it quickly expanded to a plan for 14 blooms - 
and then i added one more at the last minute!

continue reading to see all 15 floral creations from my studio...

5.04.2022

May flowers: daffodil, daisy & dandelion

.flowers,art,wreaths,art challenge,diy decorating,up-cycling,spring,trash to treasure,re-purposing,paper crafts,painting,DIY,crafting,Instagram,art class,creativity,garden art,tutorial,diy flowers, arts & crafts, May flowers, May flower challenge

D is for daffodil, daisy, and dandelion!
(and a bunch more, like delphinium and dahlia and daphne)

continuing with the May Month of Flowers art challenge,
i've shared those three on Instagram on May 4 / day 4 / letter D -
and thought i'd share them here, as well!
several are older projects, and a few are brand new - created just for this challenge.

continue reading to see them all and learn how i made them...

3.31.2022

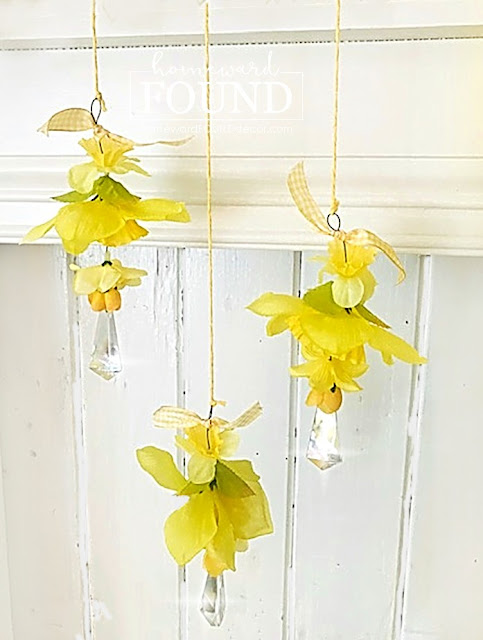
daffodil sun catchers

spring,flowers,garden art, garden style,DIY,diy decorating,decorating,seasonal,re-purposing,up-cycling,boho style,tropical style,tutorial,sun catchers,spring florals,spring floral sun catchers.
daffodils are my very favorite flower...

i have loved them since i was a little Debby,
and saw the happy, silly, bobbing heads in Disney's 'Alice in Wonderland' - 
'Daffy O'Dill' made me laugh!
later in life, William Wordsworth's poem about dancing daffodils enchanted me,
and when i first saw hundreds of acres of daffodil fields in Washington's Skagit Valley,
my eyes filled with tears at the beautiful sight.
i used to visit those fields every March when i lived nearby.
now i take any chance i can to find other ways to enjoy daffies in spring - 
even if i have to make it myself!

this simple craft project combines the sparkle of light via crystals with silk flowers,
and is a lovely way to add some spring fresh style to any room.

continue reading for my easy tutorial... 

7.27.2021

yarn + twine pineapples

summer,tropical style,coastal style,beach style,tutorial,Sweet Sweater Pineapples,Sweet Sweater Originals,DIY,diy decorating,decorating,crafting,crafting with kids,sweaters,re-purposing,up-cycling,sweater crafts,summer crafts, summer decor,tropical decor,pineapple decor.
as i was making my new Sweet Sweater Pineapples
(shared in my last post - link below)
i came up with a few more ideas for easy-peasy pineapple crafts...
like, SO easy. kids can do this easy. no adhesive easy.

continue reading for the two-step tutorial -
PLUS another way to make a 'sweater' pineapple!

3.29.2021

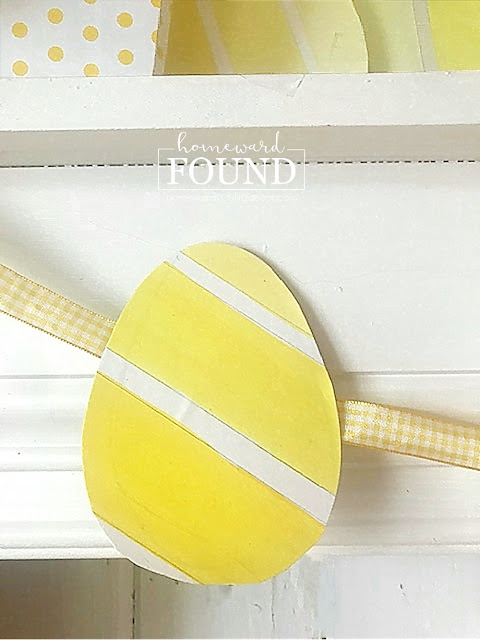
be a good (repurposed) egg

art,paper crafts,paper,wall art,spring,Easter,painting,DIY,diy decorating,decorating,wreaths,colorful home,Pantone color of the year,yellow,Illuminating Yellow,Pantone 2021 color of the year,Easter eggs,Easter decor,spring home decor,spring decorating,use what you have decorating,re-purposing,upcycling,trash to treasure,paint chips,paint chip inspired.
last spring, i created several decor elements inspired by paint chips. 
okay, okay... i basically spent most of 2020 finding creative ways to use paint chips! LOL

this year, i've pulled those out of storage and found fresh new ways to use them...
because the yellow just serendipitously fits my current color obsession perfectly
AND
because it's not necessary to have/buy/make ALL NEW things EVERY year.
(i felt a great disturbance in the force as retailers across the globe shuddered at that...)

it's fun finding new ways to use what you have!
continue reading to see the new ideas that i came up with...

3.22.2021

the daffodil queen

DIY,jewelry,junking,junk makeover,original designs,Mother's Day,re-purposing,seashells,trash to treasure,up-cycling,vintage,spring,flowers,daffodils,daffodil crown,crowns,tiaras,Junk Queen crowns,spring decor,spring gifts,birthday crown, spring crown.
it's my birthday week ;) 

and if there's ever a day that a girl deserves to wear a crown,
it's on her birthday / week / month. no matter her age!


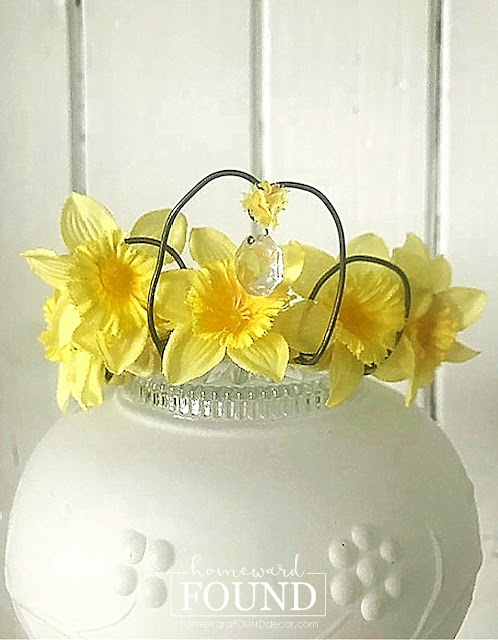
a tiny wire crown (that i made over a decade ago)
has been embellished with tiny faux daffodils... my favorite flower...
and though i am not nor have ever been a bona fide 'daffodil queen',
i think maybe for today, i shall proclaim myself one!

continue reading for the simple transformation...

3.19.2021

pop art paper posies!

art,art class,paper,paper crafts,flowers,crafting,crafting with kids,dollar store crafts,diy decorating,DIY,decorating,spring,trash to treasure,spring flowers,spring decorating,pop art,pop art crafts,black and white art,black and white flowers,pop art decor,line art,crafting with paper,spring flower crafts .
a recent creative challenge i am part of called for participants to share
how we've invoked the spirit of spring in our art.
well, my 'art' is craft - using re-purposed, upcycled, re-imagined materials.
and my first response was to think of my paper paint chip daffodils,
so i submitted a photo of those.

then i thought of another idea, and wanted to play with it...
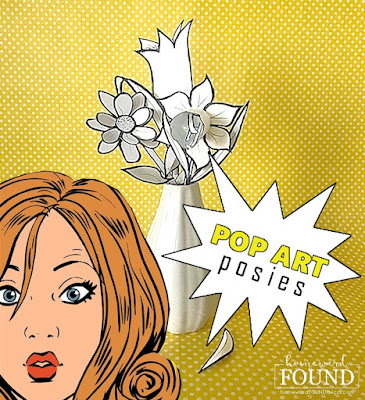
since i love making somethin' outta' nuthin', i chose to use plain cardstock paper!

the result of my afternoon 'playtime with paper, paste and scissors' is something
that reminds me for all the world of pop art, like Andy Warhol's famous pixilated works.
it also makes me think of the art of Sina Trixx, an inventive design firm
(view their astounding pop art architectural creations on Instagram)

can black + white evoke springtime? yes! 
continue reading to see how...

2.22.2021

a warm welcome

color,color palettes,colorful home,Pantone color of the year,decorating,DIY,diy decorating,coastal style,farmhouse style,flowers,wall art,vintage,thrifted,white,spring,yellow and gray,yellow and gray home decor,Pantone 2021,Pantone color of the year,Illuminating Yellow,Ultimate Gray,entry decor,entry hall,entryway decor,home decor,spring home decor,vintage pegrack
i've been busy creating a fresh look in our entryway -
it's a small area and so easy to change!

addressing the change of seasons was an easy task:
color offers warmth and a happy welcome this utilitarian area.
by incorporating a few soft touches, some interesting textures and elements,
and ways to tackle the detritus that often gathers here in this 'drop zone',
it's gone from a pass-thru area to one we notice and enjoy a bit more.

as usual, i didn't spend a cent to restyle this area - 
i shopped the house and pulled a new look together for nuthin'!

continue reading for some simple decorating tips...

7.09.2020

scrap paper posies

art, art class, boho style, color, color palettes, crafting, DIY, diy decorating, dollar store crafts, gift wrapping, paper, paper crafts, re-purposing, up-cycling, vintage paper, wall art, paper flowers, quarantine crafts
some days, we just need a break. right? 
a chance to rest, an opportunity to cut loose, a moment to relax.
not every project has to be a ground-breaking new invention. or a massive undertaking.
sometimes - especially during a worldwide shutdown -
we just need some mindless activity to distract ourselves from anxious thoughts.

so while i've completed some big projects over the past few months,
and the muses have been kind enough to lead me in the direction of new creations,
i've also given myself the gift of time to PLAY. as in: projects just for FUN.
not necessarily to blog about, because they aren't always AMAZING,
but to sit back for a time and play around - and see where it goes.
i'll look at something in my studio and think 'what if i.....' 
and then i'm off, trying something new.

no matter what i am making, i always have fun playing with paper, scissors, and glue.
(sometimes my creative life feels like kindergarten....)
my challenge to myself these past four months has been to ONLY use what i have here at home.
(yes, the vintage roll of crepe paper from a recent post broke that rule...
but i hadn't gone out specifically shopping for craft supplies.)
i've got a lot of stuff around here, so there are ample 'art supplies' at hand.
and rarely do i use things the way they were intended to be used.
i just see things.... differently.

take gift wrap paper, for instance.... sure, i wrap gifts with it. 
but it's basically an art supply, right? paper of any kind is an art supply. 
oh, how i love art supplies. always have. even when they aren't from an 'art store'.
even when it's technically trash...
these scrap paper posies turn trash into treasure,
and are a quick project, perfect for de-stressing on a hot summer day!

continue reading to see where the inspiration for these colorful blooms came from...

4.09.2020

a sunny bunny Easter table

color, color palettes, decorating, DIY, diy decorating, Easter, entertaining, fast cheap and easy, flowers, gift wrapping, spring, Sweet Sweater Bunny Tails, tablescapes, Easter table decor, Easter decorating
 i dunno' what the weather is like where you live, but here, it's positively murky.
gray, rainy, COLD (relatively speaking - it's cold for us!), and dismal.
this whole isolation/quarantine/stay home order would be a LOT easier
if the sun would shine and the weather would warm up 
so we could spend time outside in our yard!

sometimes, we can't wait for the sunshine - or spring - to come to us. 
we have to go to it.
and since we can't go anywhere right now, we have to CREATE a sunny spring.

that's what i did for our Easter table - i created some sunshine!
i grabbed everything yellow i could find and put together a simple, easy, happy tablescape
that's made up of just 'everyday' stuff, coordinated by color.

my homebound friends, you can do this in just minutes with ANY color you have on hand!
don't let being stuck inside the house because of weather or quarantine stop your celebration.

continue reading to see more details that i hope will inspire you to 'get to spring'...

3.20.2020

painting the daffies yellow!

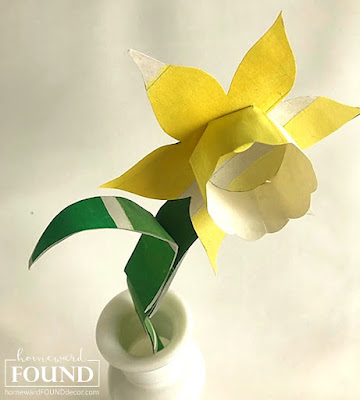
art class, color, color palettes, crafting, crafting with kids, decorating, DIY, diy decorating, Easter, flowers, paper crafts, paper, painting, re-purposing, spring, up-cycling, tutorial, spring decorating, crafts for kids, daffodils, paper daffodils
spring 2020 sure is coming in like a... not lion. more like a T-Rex!
as we all adjust to this 'new normal' (and no, it's not normal),
we're all looking for activities that calm us, entertain the kids, make home a bit more... home-y.
.
using my recent 'paint your own paint chips' technique,
i've been happily painting away and then making new decor elements with the results...
this time 'round, i came up with flowers.
i'm not painting the roses red... i'm painting the daffodils yellow!

continue reading for my easy tutorial for this sweet spring project...

3.06.2020

greenhouse from salvaged windows

decorating, DIY, diy decorating, farmhouse style, garden, industrial, junk makeover, junking, original designs, outdoors, re-purposing, rustic style, salvaged, spring, up-cycling,
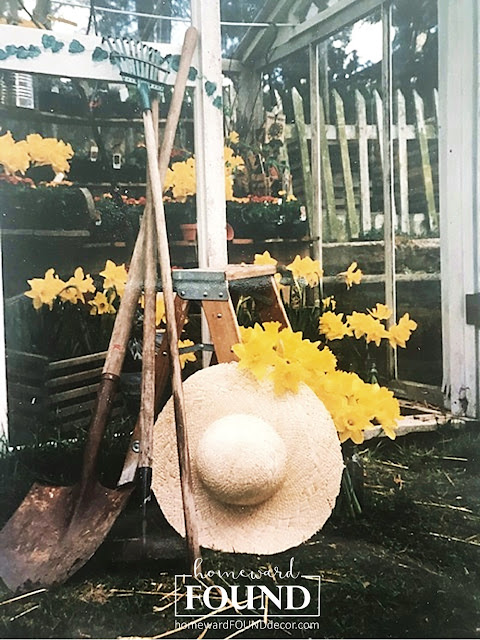
 going through an old journal, i stumbled across these photos... from 1995.
(that's so long ago that i used an old-school film-loaded camera and had them printed!)
they show a very sweet birthday surprise that my late husband created for me:
a small backyard greenhouse, made from vintage windows.

he covertly collected vintage windows and a door (free off of Craigslist!)
then built the frame and inserted the windows to make this charming little place for me...
it was one of the nicest birthday gifts he ever gave me.
(i just wish i had been a better photographer back then!)

continue reading for more photos, and details about how he built it...

3.21.2018

Create a Vintage Spring Tablescape

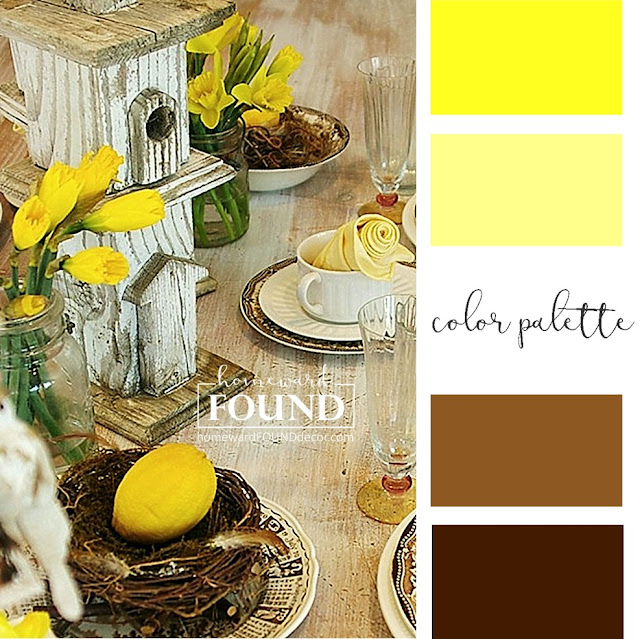
 yes, that IS brown on my table - in springtime!!!
everywhere you look, pastels reign supreme for spring + Easter decor, 

but this year i just felt like breaking the mold.

i love neutrals, and it's SO easy to create a neutral setting then add in a pop of color.
i've decorated this way for years and years, and it's never boring or limiting.
using a basic three-color palette (varied hues of brown, yellow, and white)
i've taken my own spring farmhouse style in a new direction with this tablescape...

continue reading to see how!

11.15.2014

from fresh to faded...

 Two weeks ago, I was working at my second job (visual stylist for a charity resale store),
and at lunchtime, I walked to the nearby grocery store for a sandwich.
 Just inside the door, I passed the floral case,
and next to it was a funnel of plastic-wrapped rose bunches, all looking a 'little' weary.

You've all seen those bouquets - 
the ones with a few drooping flower heads and some browning outer petals?
They were priced at a mere $1.99 each,
so I grabbed a bunch of white and a bunch of rusty orange roses,
and took them back to the store (along with my chicken salad on sourdough, and sweet tea).

After I ate lunch, I popped the roses into a vase of water and put them into this display:
I figured they could live there for the weekend, freshening up the display,
and then I'd toss them out the next week. Cheap props, just the way I like 'em!!!
Only, when I came back, they had begun to dry in perfect form....
so I didn't throw them out.

I wrapped each bunch up in our store's tan tissue paper, and took them home.
They just kept drying, all wrapped up, 
without losing petals or bending or looking forlorn.

That's when I decided to keep them indefinitely - and decorate with them!
 I tucked the tissue-wrapped bundles of roses into a burlap market bag on the dresser in my office.
The fading color of the white roses coordinates perfectly with my neutral decor,
(which is why the rusty orange ones don't show in this photo, they are tucked down into the paper)
and the soft lingering rose scent is a welcome addition to this area near my desk.

I may never throw these out.
I may let them continue to dry out, eventually de-heading them from the stems
and adding them to a bowl of potpourri or layer the inside of a nest with them.

I've added fresh flowers to my decor for years,
letting the blooms dry in place and enhance the decor for weeks afterward:


 Hydrangeas are one of the easiest flowers to let dry 'en scene', as are roses.
Gardenias and Narcissus / Daffodils also dry well.

In August of 2013, my best friend of 37 years passed away.
I created a bouquet for her memorial service from fiery orange roses and lilies,
inspired by her fiery red hair and spirit.

I saved a few of the roses that I didn't put in the arrangement,  and I still have them...
the perfectly dried petals nest in a special teacup here in my office.
Those rose petals mean the world to me, because they are a connection to her.
This isn't just true for REAL flowers, either...
Long ago, I found a bunch of vintage fabric roses at a thrift store - for a song.
I cleaned them, then wrapped them up in a bit of vintage sheet music.
I displayed them lying on the table (this one made from a vintage peach-painted door)
and the simplicity of the display was timeless.

Finding beautiful decorative elements isn't about what you spend...
I'm getting a lot of lasting enjoyment out of two simple and cheap bouquets.
It's about the value you coax out of the elements.

Next time you grab flowers at the market, 
think about how you can extend their contribution to your decor...
choose flowers that will dry well, and enjoy them from fresh to faded.
.
PS: That lampshade in the photo up above?
I'll share its secret in my next post !

11.08.2014

Garden Planter = Wire Dome

bring the beauty of nature indoors with
a dome made from a wire garden planter!

It's perfect for every season...
* over a nest with leaves tucked into it, resting on a wood round for autumn.
* over a branch of evergreen with some vintage ornaments or pine cones for winter.
* over a nest with wood or stone eggs and tiny daffodils for spring.
* over a white ironstone plate filled with shells from the seashore in summer.

 You aren't going to believe how easy this ONE STEP PROJECT is!
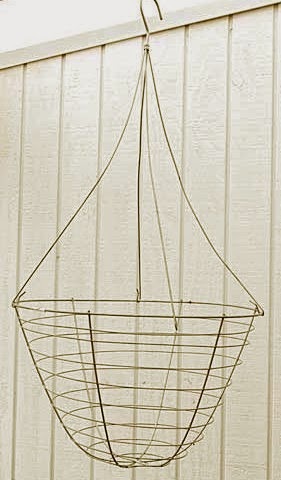
 Start with a simple wire garden planter from the home center:
Disconnect the hanging wires. Turn the planter upside down,
 ... and voila, you have a wire dome!

You can also cut a short length of the hanging wire
and then attach it as a loop at the top of the planter as a handle, as I've done here.

The planters will come as new, shiny metal from the home center -
but if you look for them at garage sales and thrift shops, 
you just might find some nicely rusted ones like these!

You can also make a wire dome from a tomato cage too!

Way back in 2008, I sold these in my booth at Faded Elegance Antiques in Everett, Washington -
and I kept having to make them because they sold so fast!

Fun Fact:
This photo is of my very first 'vintage' booth,
a little space that was a mere 2 feet deep and 8 feet wide in the back of the store.
It was the first stop of many wonderful years as a vendor in the vintage world.
This is where 'Retreat' started, 
and you can see how my former business reflected my love of nature 
and of using everyday items as decorative elements -
just as I do here at homewardFOUND decor.

shared online:

cupcakes & crinoline | Project Inspire{d}


funky junk interiors | diy salvaged junk projects #420

4.29.2014

Sweet Simple Nests

Years ago, I was bent on cleaning up some flower beds near my front entry.
I had endured the garish orange day lilies blooming there (planted by the owner of the house),
and now that they had finished, I was ready to eradicate them from my yard. 
I wielded cutters and rake, bringing them to their proverbial knees...

and quite by accident, I discovered a new material to create with:
DEAD foliage.

Deb has not gone 'round the bend here, I swear....

The dried, browned stringy leaves of the daylilies had landed in piles as I trimmed.
And those piles looked like something to me,
so I picked up a hunk of foliage and twisted it around in my palm, 
and Lo and Behold, a NEST emerged!

I created a whole bunch more, and decorated my home with them.
Then I made even  more, and sold them at vintage shows.
When those ran out, I found pots of dead daffodils at the nursery, 
and they GAVE THEM TO ME!
So I made more nests. With FREE STUFF. We ALL like that, right?!

So in case you'd like to try this, here's my SUPER SIMPLE method to
 turn dead leaves into nests in just three simple steps!


Prep:  Get a pair of scissors and some cotton string or hemp twine,
and cut it into a three-inch length for each nest you want to make.

Step 1:
If the foliage is still attached to the plant, in the ground or in a pot, make this easy on yourself...
grab the foliage just above the bulb area, and cut there.

Step 2:
Bunch the foliage into a long strip, and begin twirling it into a circle shape in your hand
by curling the cut ends around toward the strip. 
Twirl it once or twice or three times around, depending on the length of the foliage.

The uneven ends of the foliage should be on the outside of the nest,
giving a more natural appearance to it when done.

OPTIONAL STEP:
Add pieces of thread, ribbon, twine, etc. to the strip of foliage before creating the nest
to make it look more like a real one made by a bird.


Step 3:
Tie a piece of the string / twine around the foliage on the side where the cut ends of the foliage are -
just like threading a needle, feed one end of the string into the hole - and then tie a knot.
This will hold the nest together and keep it from unwinding.
Then cut the string ends off.

Add any charming little details you'd like to...
a tuft of moss, a fading gardenia bloom, rose petals, a precious found object.
I just sit mine in there because I like to change them,
but you can attach yours with glue if you'd like.

Then display your sweet nest as part of your Spring decor!
Here are two ways I displayed the nests I made:

An aqua glass candle holder lifts the nest up like sculpture,
while the galvanized lantern functions like a tiny house for a bird nest.

You can see more of my nest creations on HOMEWARDfound
 Here . Here . Here . Here

shared online:

Yesterday on Tuesday | Project Inspire{d}
(Malia Featured my sweet nests!)


3.27.2014

Tutorial: Chenille Stem Daffodils

March ends this weekend... and before it's all over,
I wanted to share ONE LAST DAFFODIL PROJECT with you!

About six years ago, I unearthed a bag of vintage yellow chenille stems at a thrift store.
They were the 'wavy' kind - like these (available HERE):

You know that the first thing I thought of when I saw them was daffodils, right?!
As I was playing with them, making daffodils, I came up with an improvement...
the center section became A CROWN.
... and VOILA! 'DIVAdils' were born!

I still have those same Divadils that I made all those years ago
and thought I'd share a quick tutorial for making them...
Please note that these do use PINS, so they are NOT a kid craft project
and are definitely not for kids to play with.

Whatcha' NEED:
 Materials:
'wavy' chenille stems or rope in yellow or white 
regular chenille stem in green + length of baling wire for stem
yellow or white paper . scissors . glue stick to make the paper crown
yellow or white pompom . 2 regular pins . 3 floral pins with pearl ends

Whatcha' DO:
1. starting at one end of chenille stem or rope, fold two 'wavy' sections together - 
and pinch the skinny section in the middle to make one petal. 
then wrap the end to the next skinny section to secure the petal in place.

2. move down the chenille stem and repeat -
 then wrap the next skinny section once around the petal base to secure it.

3. repeat petal process until you have 3 petals (using a chenille stem) or 6 petals (if using chenille rope).
if you have 3 petals, repeat and create another set of three.

4. if you have two sets of three petals, wrap the two remaining end sections together to attach.
with either method, leave an end section to attach the green stem to...

 5. take the green straight chenille stem and wrap it around the baling wire piece to cover it.
create a small hook at the top of the wire, and slip the remaining end section of wavy chenille through it
on the back side of the flower.

6. wrap the wavy chenille around the top 1/2 inch of the green stem to secure it.

 7. place the pom pom in the center of the front of the flower.
hold it in place using the three flower pins with pearl heads - 
stick them through the pom pom and into the chenille flower petals.
you can use hot glue if you want.

 8. cut a strip of paper @ 1" wide and 4" long.
on one side, cut out a crown shaped edge - basically really long, pointy triangles!
then use a pen or pencil to curl the edges of the points outward.
roll the paper into a tube with the points curling outward.
use a glue stick to secure it into a tube.

 9. slip the paper crown over the floral pins and pom pom.

 10. push the two regular pins into the crown (one on each side),
running them through the pom pom to secure the crown to the flower.

11. bend the tips of the petals into various curved shapes - some forward, some back. 
or close them in on themselves for a daffodil 'bud', as shown below...

 ~~~~~~~~~~~~~~~~~~~~~~~~~~~
I also used the same method to create 
these holiday poinsettias from green vintage chenille stems!
[ the centers of these are metallic plastic mini ornaments ]

shared online:

One Project Closer | Creativity Unleashed

Cupcakes & Crinoline | Project Inspire{d}