. -->
Showing posts sorted by relevance for query paper flowers. Sort by date Show all posts

11.12.2021

fall paper leaf arrangement

seasonal,colorful home,Thanksgiving,diy decorating,up-cycling,trash to treasure,paper,fall,paper crafts,DIY, junk makeover,crafting,wall art,tutorial,re-purposed,fall florals,fall home decor,fall centerpieces.
i've had to get creative to bring a fall feel into my home
(there's not a fall leaf in sight outside and it's still in the 90's... sigh)
but i've managed to find a way! it's PAPER!

some of the leaves from the wreath in my last post joined with new ones
along with faux florals + leaves and a branch from my backyard tree
to create this lovely fall arrangement.
it's easy-peasy AND it won't fall apart! (hah. pun not intended)

continue reading for more details...

4.19.2023

junky bloomz!

spring, flowers, garden, garden art, garden style, diy decorating, DIY, decorating, trash to treasure, re-purposed, up-cycling, crafting, junking, junk flowers, junk blooms, plastic plate flowers, tutorial
'reduce reuse recycle' is the leitmotif of my design & decor approach...
i'd much rather use what i already have on hand here at home
than 'buy more, store more, discard more'.
by using what i have, i'm challenging my own creativity
and making my life easier by not having to wrangle more storage bins! 

as i was cleaning out a cabinet in my studio recently,
i stacked miscellaneous items on my worktable and floor.
as i turned to grab something to put it back in the cabinet,
i saw that some of the elements stacked together created a 'flower' of sorts...

and deb was off on a creative adventure!
(yes, i KNOW it's actually procrastination but just go with me here, ok?!!!)

continue reading to see how many different flowers i created with 'junk'!

6.28.2021

sunny paint palette wall art

summer,art class,wall art,color,colorful home,Pantone color of the year,crafting,crafting with kids,DIY,diy decorating,gift wrapping,paper,paper crafts,trash to treasure,tutorial,up-cycling,re-purposing,salvaged,sunshine theme,sunny day crafts,sunny day decor,summer home decor,kids crafts,yellow,Pantone Illuminating yellow,Pantone 2021, summer crafts,summer paper crafts
bored yet?
no, not you - your KIDS!
i know, we're barely into summer vacay. but i know kids!
if you're looking for simple, cheap, 'trash to treasure' craft projects to keep 'em busy,
this post will show kids how to make their OWN sunshine!

last fall, i played around with some of my disposable paper & plastic plate paint palettes
and made paint palette pumpkins (link at end of post)
today i grabbed a few palettes that i've used as i paint all.the.things yellow,
and found ways to turn them into happy sunshine art!

continue reading for a few easy scrap paper crafts to brighten up your days...

2.04.2013

It's a Wrap


make easy seasonal changes to your clear glass vases with paper

whether you use an assortment of vibrantly colored wrapping paper as shown here,
or the subtle tones of vintage sheet music and book pages,
it only takes a minute - and makes a big impact.

 the two papers used here are the remains of a roll of Christmas wrapping paper
[red on one side, and white with red polka dots on the reverse]
and a piece of 1970's era heart-print gift wrap that was unearthed in an old box

 there are two methods:
* cut a piece of paper to fit INSIDE the glass vase if you are using silk flowers or twigs
* cut a piece of paper to fit OUTSIDE the glass vase if you are using a candle or real flowers in water
a few small pieces of double-stick tape will hold the paper in place

[the small hearts shown on two of these vases 
were cut from the opposite side of the paper and taped in place]

 you can also use ready-made paper items:
these small vintage-look cupcake/candy cups fit perfectly 
the outside of small glass flowerpots,
creating a sweet setting for a tealight candle

one more idea:
after you've inserted the paper INSIDE the vase for use with faux flowers,
place a white heart-shaped doily between the glass and the paper
[or perhaps a special love note or photograph!]

shared online:


Be Inspired Fridays by Common Ground


3.25.2014

Tutorial: Recycled Paper Daffodils

I love turning scraps into decor items... paper, for example.
Whether it's leftover gift wrap, an old magazine, or a book of vintage sheet music,
I love looking at it and asking myself 
"OK, what can I do with THIS? (besides pitch it into the recycle bin)."

I did that today, and here's what resulted:
Happy Spring Daffodils, 
made from recycled paper!

How about a tutorial, you say? OK!
Materials:
scissors. masking tape . glue stick . bamboo skewers . paper
 .
 Step by Step:
1. fold sheet of paper (music, construction, magazine page) in thirds as shown.
2. fold in half where the two sides meet in the center.
3. draw half a flower shape with four, five, or six pointed leaves at the double -folded edge of the paper.
4. cut the flower shape out - this will create TWO flowers because of the double fold.
 5. cut a strip of another kind / color of paper - @ 1" wide and 4" long.
6. fold 1/3 of the strip toward the center, lengthwise.
7. unfold the folded third of the strip, and cut slits into it (creating a thick 'fringe').
8. roll the strip over on itself @ the size of your finger, and glue the rolled portion to the flat portion.
9. continue rolling and glue the end of the strip to the roll to secure it.
 10. fold the fringed ends together and glue into place.
11. then add glue to the outside of that end, and 
12. place the rolled section in the center of the cut-out flower shape, with the glue down. 
press to secure.
Now you have a daffodil!
You can glue this to a magnet or card, or shadowbox frame.
To add a stem and leaves, continue....

13. and 14. from the leftover scraps after cutting out the flower shape,
cut a circle about the size of a quarter.
15. secure the back of the daffodil to a bamboo skewer, using a small piece of masking tape.
16. glue the circle you cut out OVER the masking tape, using the glue stick.
 17. cut a leaf-shaped strip from the leftover paper scraps.
18. push the bamboo skewer 'stem' through the paper leaf.
19. put glue on the leaf and wrap it around the bamboo skewer once.
20. wrap the other end of the leaf around a pen or pencil to give it a curling shape, 
like a real daffodil leaf.

 display and enjoy your paper daffodils!
~~~~~~~~~~~~~~~~~~~~~~~~~~~~~~
Here's another method for making them that should remind you of elementary school:
 when you get to step 5
use a cupcake or bonbon paper liner instead of rolled paper for the flower's center!
[ I cut and glued a second circle shape INSIDE the paper cup on this one ]

 using colorful cupcake papers & pages cut from magazines 
results in bright, happy flowers!


5.12.2022

what's your inspiration board style?

DIY,diy decorating,re-purposing,up-cycling,paper crafts,inspiration board,mood board,creative spaces,decorating,organizing,colorful home,color,gift wrapping,dollar store crafts,wall art,tutorial,winter decor,winter diy, winter home decor 
in the past few weeks,
i've shared some flowers that i've created with paper.
well, there's something else i've done with paper for many MANY years -
i make pinboards / bulletin boards / inspiration boards
and fill them with all kinds of paper detritus that i've collected
over several decades.

they serve as not only inspiration and a way to corral my 'vision',
but also as a decor element in my studio.

i recently re-read an
old Houzz.com article about inspiration boards - 
and how the way you create yours reveals
if you are a
left-brain creative or a right-brain creative!

Artists and Creatives know that we are right-brain people, for the most part.
but apparently, our left-brain compulsion for order can often over-ride
 the instincts that we associate with creativity (um... that it's messy!).
that was new info for me.
the houzz article has a LOT of visual inspo, too!

more on that in a bit...
first, see what reading that article inspired me to RE-do in my studio,
and learn how I make inspiration / bulletin boards using simple materials. 

continue reading for more...

4.27.2018

May Day 'Posie Pails'

tutorial, crafts, junk, junk makeovers, garden crafts, repurposed, upcycled, diy, diy crafts, May Day, flowers, nosegays, use what you have decor. home decor, spring
here's a simple tutorial for a May Day flower holder - from a tin can!
it's time to go back to the days when we left flowers on our neighbors' doorknobs
on May Day, don't you think?

this project, my friends, is a real 'blast from the past'...
not only did i paint hundreds and hundreds of my tin can pails for years,
but i also created this idea using seed packets as artwork for a simple DIY version...
and shared it here on homewardFOUND waaaaaaay back in 2013! yes, FIVE years ago!

...continue reading for my easy tutorial to make what i am now calling 'Posie Pails'!

1.24.2020

paint the town pink!

paper valentines day heart decor, paint chip decor, paint theme party, pink, valentines day, hearts, home decor, diy home decor, paper crafts, pink party decor
in my last post, i mentioned some hearts that i had made out of paint chip cards -
but i didn't have a great photo of them to include in the post. i just found those paper hearts in a bin!
i snapped a few quick photos just so i can share them...

so let's consider this my 'Paint the Town Pink!' post Part Two!

continue reading for the details + more ideas...

10.29.2021

last-minute 'pumpkin party' decor

art,art class,color,color palettes,colorful home,crafting with kids,DIY,diy decorating,dollar store crafts, painting,fall,pumpkins,crafting,Pantone color of the year,embellished pumpkins,pumpkin decorating,decorating with pumpkins,painted pumpkins,ribbon crafts, paper party decor
ever wondered how deb's muses work?
here's an example of the crazy ways things connect in my brain:

while in the process of cleaning up my studio
(an Herculean task, let me tell you....)
i found a plastic bag filled with some yellow paper party supplies
that i had picked up while out thrifting - and promptly forgot about!
the paper goods were immediately removed from the bag,
and tucked into a drawer where i keep all of the scrap paper & magazine tearsheets
so i wouldn't forget about them again - i'm in that drawer at least once a day.

just hours later, i scrolled through social media and saw a photo of a big fat bow,
thought 'that's cute', and kept scrolling. then i stopped.
in my mind, the big fat cute bow merged with the paper party supplies,
and became 'a pumpkin party' in my imagination...
pumpkins bedecked with ribbons and bows in a 'party' setting.

the combination of the two - plus some stickers and more party decor - 
turned out cheerful, happy, and so easy to create
and it took me just minutes to assemble the vignette shown above...
which makes it a PERFECT last minute decor idea,
and a great 'no carve' pumpkin decorating project for kids.


continue reading for the details...

4.12.2023

NEW! Sweet Sweater Potz!

spring, garden style, flowers, DIY, diy decorating, Sweet Sweater Originals, Sweet Sweater Potz, sweaters, crafting, decorating, re-purposing, up-cycling, trash to treasure, flower pots, plant pots, tutorial
spring has sprung! 
one of my favorite passages in the Bible speaks of spring the way i think of it:

"For now the winter is past; the rain is over and gone.
The flowers appear on the earth, the time of singing birds has come,
and the voice of the turtledove is heard in our land.
The fig tree forms its early fruit; the blossoming vines spread their fragrance."
Song of Solomon 2:11-13

watching nature come back to life after a long cold winter revives me.
especially in a weird weather year like this one
(endless rain. snowing at DISNEYLAND! tornado near Los Angeles!),
i am always happy when spring finally arrives...
and if it doesn't arrive soon enough for me, i just create my own kind of spring vibe!

my newest Sweet Sweater Original TM creation is a nod to springtime
that i'll be enjoying for the next few months...

continue reading to see how simply you can create my Sweet Sweater Potz!

4.29.2023

faux food flower 'cupcakes'

spring, flowers, garden style, foofoo Faux Food, DIY, diy decorating, decorating, just for fun, dollar store crafts, crafting, styling a spring tiered tray, tiered tray decor, faux cupcakes, faux cupcake decor .
continuing with my floral theme for this month,
i whipped up these fanciful floral 'faux food' cupcakes...
which i did not make with butter, eggs, sugar, and flour.

my friend Sasha ('Saucy') decorates very real cakes and cupcakes
with the most fantastical elements - like frosting flowers.
her delightful creations inspired these flower-decorated cupcakes,
and also inspired my faux gingerbread cake last December.

some projects have a lot of prep, a lot of elements, a lot of steps.
this isn't one of those. this is a one-and-done decor project. easy-peasy. 
i can't even call this a 'tutorial' because it's SO easy.

don't believe me? continue reading!

8.06.2021

boho chic: embellished hats

coastal style,beach style,flowers,wreaths,decorating,vintage style,farmhouse style,diy decorating,summer,re-purposing,white,diydecorating,vintage,boho style,neutrals,dollar store crafts,boho chic,boho chic fashion,boho hats,tropical floral hats,tropical floral hair clips,beach hats,macrame'
i know, i know... a fashion accessory isn't exactly within my purview here at homewardFOUND.
but if you hang it on a wall or a door, it's decor. wink.

i recently dolled up one of my straw hats to wear to a party at the beach,
and it was so easy and so much fun that i decided to share it here on the blog.
i have a feeling you'll be inspired to make your own -
for your head, or as a perfect summer home accent!

continue reading to see how easy it is to embellish a straw hat for summer...

5.07.2020

painting books... again!

art, art class, color, crafting, DIY, garden, gift wrapping, books, painting, spring, trash to treasure, #MAYkeovers, painted flowers, flowers, gift giving, gift books, book covers
this post wasn't planned and i am not on a book-painting bender.
(just in case you are concerned about where my creativity is taking me these days!)
but when the muse strikes, i try to comply...

i'm sending this book to my little sister (it's ok, she doesn't read my blog ;) )
and while the content of the book is encouraging, uplifting, and faith-building,
i didn't like the look of the dust jacket cover. so i took it off.
the plain white cover and dark burgundy binding weren't pretty, either.
not the mood i was going for.

so i decided to send my sister flowers... painted flowers... painted ON the book! 

continue reading for more of this creative MAYkeover... 

4.14.2020

seed packet-inspired decor

art, boho, crafting, decorating, DIY, diy decorating, farmhouse, flowers, found objects, garden art, junk makeover, junking, original designs, paper crafts, Posie Pails, re-purposing, rustic, salvaged, spring, trash to treasure, up-cycling, seed packets, garden seeds
spring is here, and things are starting to bloom!
looking for a fresh addition to our spring decor after removing the Easter eggs,
i found inspiration in one of my own past projects...

about seven years ago, i shared a project here on the blog that i called 'Posie Pails'.
basically, i combined a colorful floral seed packet, some twine, and a recycled tin can
and the result was garden-theme decor accents on the cheap:

art, boho, crafting, decorating, DIY, diy decorating, farmhouse, flowers, found objects, garden art, junk makeover, junking, original designs, paper crafts, Posie Pails, re-purposing, rustic, salvaged, spring, trash to treasure, up-cycling, seed packets, garden seeds
well, i just figured out how to make an even cheaper 'quarantine crafts' version of them:

because it isn't essential to leave the house for craft supplies,

 i found a way to use floral images clipped from magazines to create my OWN 'seed packets'!
.
continue reading to see how i turned actual trash into a springtime treasure....

12.15.2016

Vintage Paper Poinsettias

My love for old book pages and vintage paper shows itself in many ways,
and I love finding new ways to use this material all year long...
so this Holiday season, I used paper as a major theme for our Christmas decor.
I created tree ornaments, garland embellishments, and other elements
that are in use all over the house.

While I created the flowers you see here to go on the tree,
they worked out much better forming a wreath on the wall in our entryway!
Tucked into a simple garland of greens and a strand of mini lights that surround a round mirror,
the paper poinsettias add the perfect touch of texture and style:
The centers of the flowers are made from vintage jewelry -  
old earrings, shoe clips, and lapel pins.
They add more texture and some sparkle, along with a touch of nostalgia.

Continue Reading to see more details...


4.24.2018

Wrap a Vase in Lace for Mom!

flowers, vases, thrifted, dollar store, repurposed, upcycled, lace, lace tablecloths, lace doilies, vintage, flowers for Mom, Mothers Day, crafting, dollar store craft supplies
Dollar Store Crafts. we ALL do it! hey, if i can find cheap supplies for home decor, i'll use 'em.
the thing is, decor doesn't have to LOOK cheap... 
adding a simple flourish to an inexpensive element raises your decor from 'basic' to EXTRA.

case in point - these simple clear glass vases from the Dollar Tree. 
paired with a lace doily or section of a lace tablecloth, they look positively elegant for spring!

continue reading for more details...

3.13.2013

floribundance

 in my last post, i shared images of this painting made entirely from flowers.
which i think is a really fun idea... and then i realized that it reminded me of something...

long before i ever saw that, i created something a bit similar.
and it all happened because of a very ugly painting...
 i'm sorry, but that's ugly.

i realize that the woman who painted the orange poppies did so in the 1970's, 
when orange and avocado and harvest gold were all the rage.
not so much in 2009, when i was given the painting.
[it wasn't a gift, it was a 'it's going in the trash, or you can have it' thing]

i stared at the thing for a few days as it sat in the corner of my studio,
often wondering of there was ANY hope at all for it.
[if i faced the same dilemma today, i'd slather the thing with chalkboard paint, like i did here !]

as happened regularly in my studio, things got placed in piles and baskets
to be used in future projects...
and one day, i moved a basket filled with vintage flowers and sat it in front of the ugly painting.

i walked away, then turned back to grab something...
and it looked like the flowers were arching forward off of the canvas.

and a light bulb went on in my head!
 why not attach the flowers TO the painting,
like a 3-D sculpture?

so here's what i did, using what i already had on hand:
 no way that orange was workin' for me,
so i painted OVER the orange poppies with white acrylic paint.
i left the dark centers alone, though.

i also went over the 'tabletop' in the painting with a wash of white - 
just enough to change the color, but let a bit of the 'wood' effect show through.
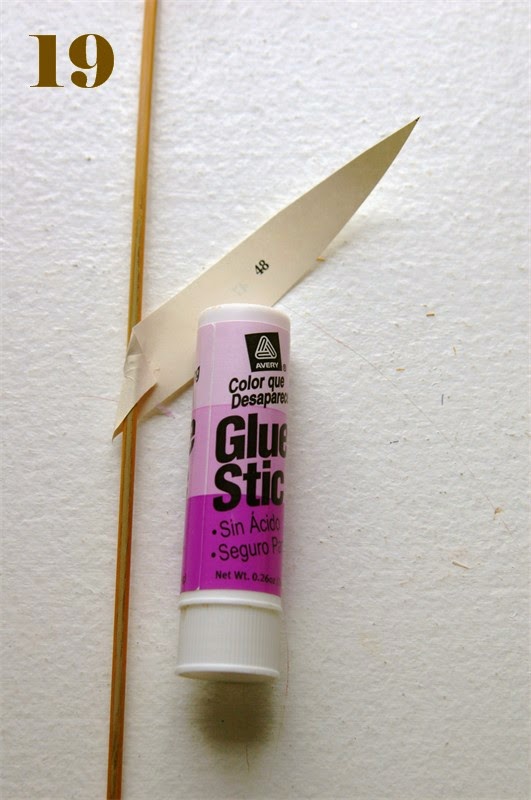
 then i took some vintage sheet music and book pages, 
and cut them to fit OVER the shapes of the vase and pitcher in the original painting.
[i used regular white glue to attach them]
 
above that, i added some lovely flower seed packets and a snippet of a song.

then i glued on some paper lace trim and some vintage gold wallpaper scraps - 
a medallion on the vase and some torn strips at the top of the 'wall' behind the flowers.

and then, i used hot glue to start adding the floral elements: 
flowers made from vintage crepe paper, moss, tiny silk blossoms & leaves, and pearls

 berries, more moss, tiny blossoms & leaves, and vintage-look flower buttons

all of the elements were added in a placement that made it look like 
they were spilling out of and over the edges of the vase in the foreground
and rising out of the pitcher in the background.

 the floral details were all in a pale green & white and 'gold' palette,
so that the background and leaves of the original painting coordinated.

 this side-view shows how the flowers pop out of the canvas.

and the finished painting looked like this:
 

 just because we ALL love 'before and after' shots
let's look at them side by side:

wow!
it's a great way to give a new look to something old - perfect for Spring!

 i don't have that 'refreshed' painting anymore,  
[so please excuse the questionable lighting - i couldn't re-shoot]
but just looking at this project makes me want to get another old floral still life painting
and do it again, in a different style!